SINCE VERSION 2.6.0 The Project Shuttle simplifies the navigation between your projects within Jira!
A new dropdown menu will be added to the main toolbar which can be used to quickly navigate to your favorite projects or links!
By adding categories, projects or links can be further grouped.
NEW 🚀 Want complete control? Just use custom icons to design the project shuttle to your needs! 🚀
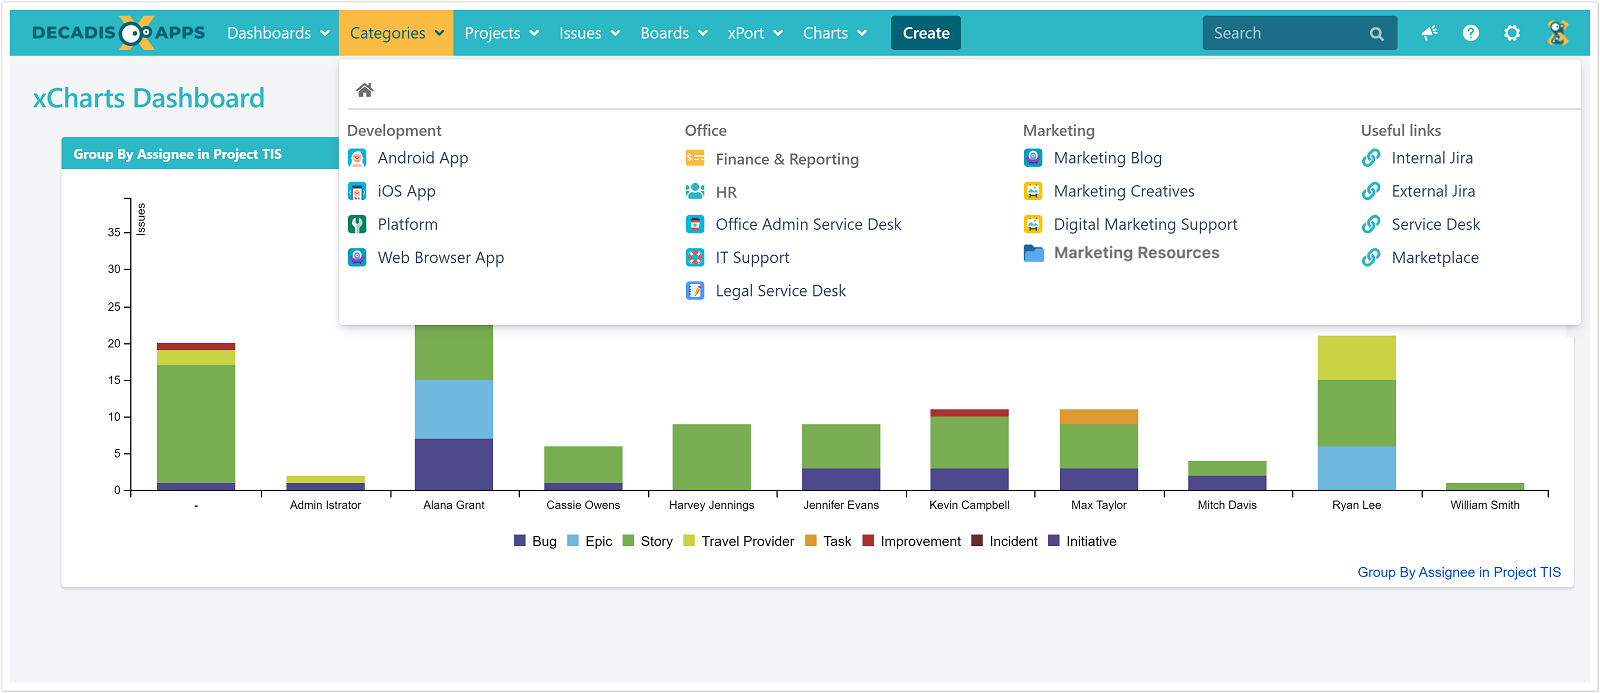
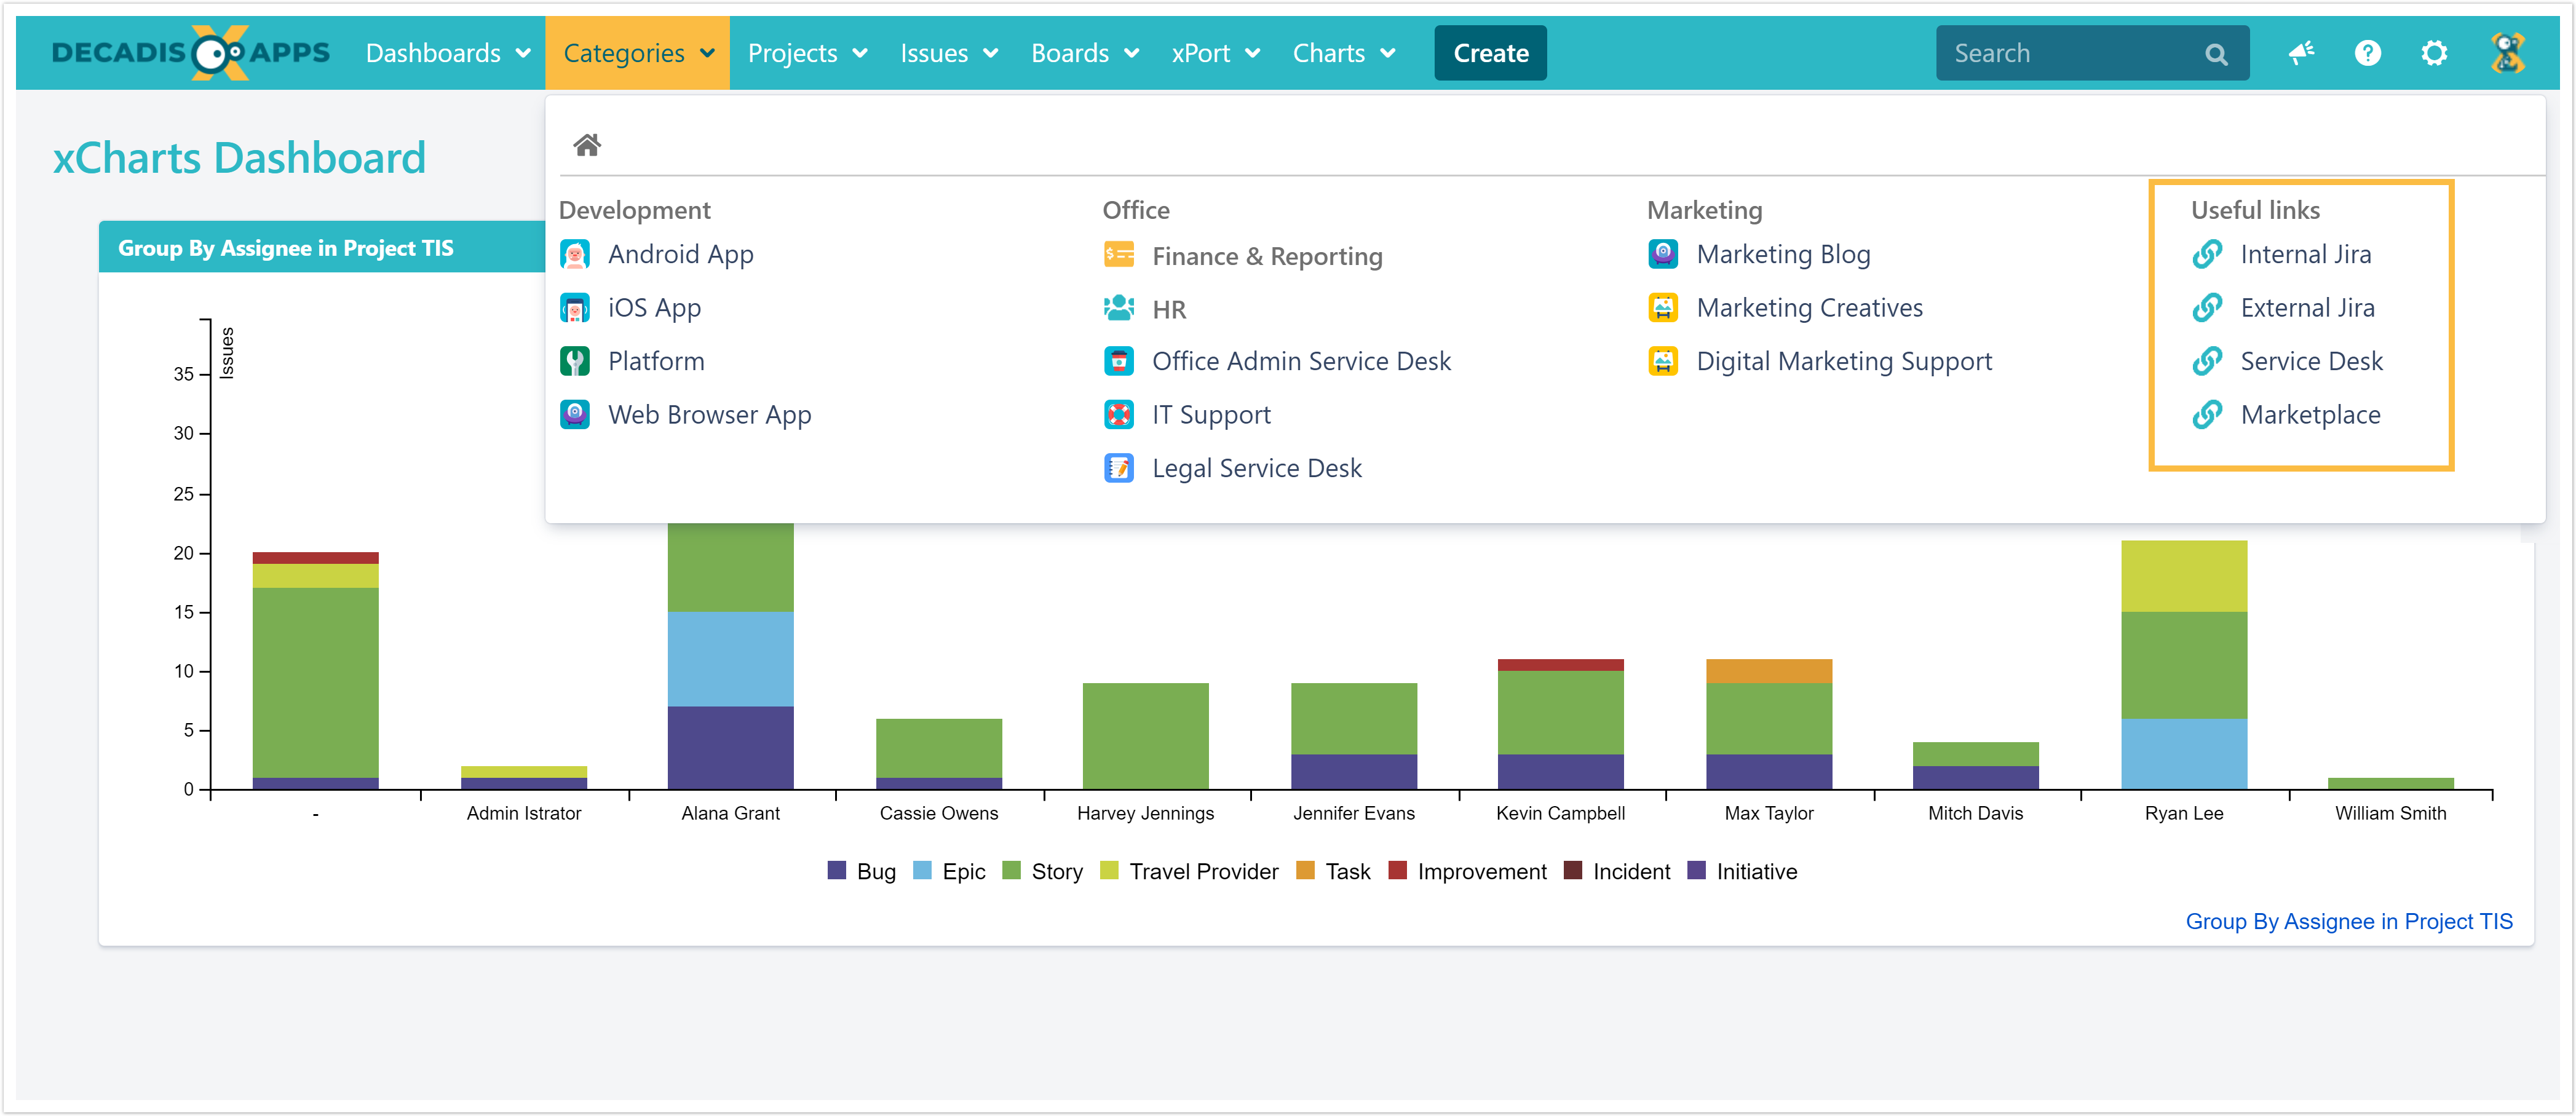
The projects can be divided into categories and sub-categories (in the image above: "Development", "Office",, "Marketing" and "Useful links" as categories and "Marketing Resources" as sub-category).
Once set up, the Project Shuttle is visible for every user in Jira.
Usage
The Project Shuttle can be used by every Jira user. Only projects the user has access to (Browse Projects permission) will be shown.
When the Project Shuttle is activated but either no categories are defined or projects have not yet been added, the menu won't be displayed.
 Configuration
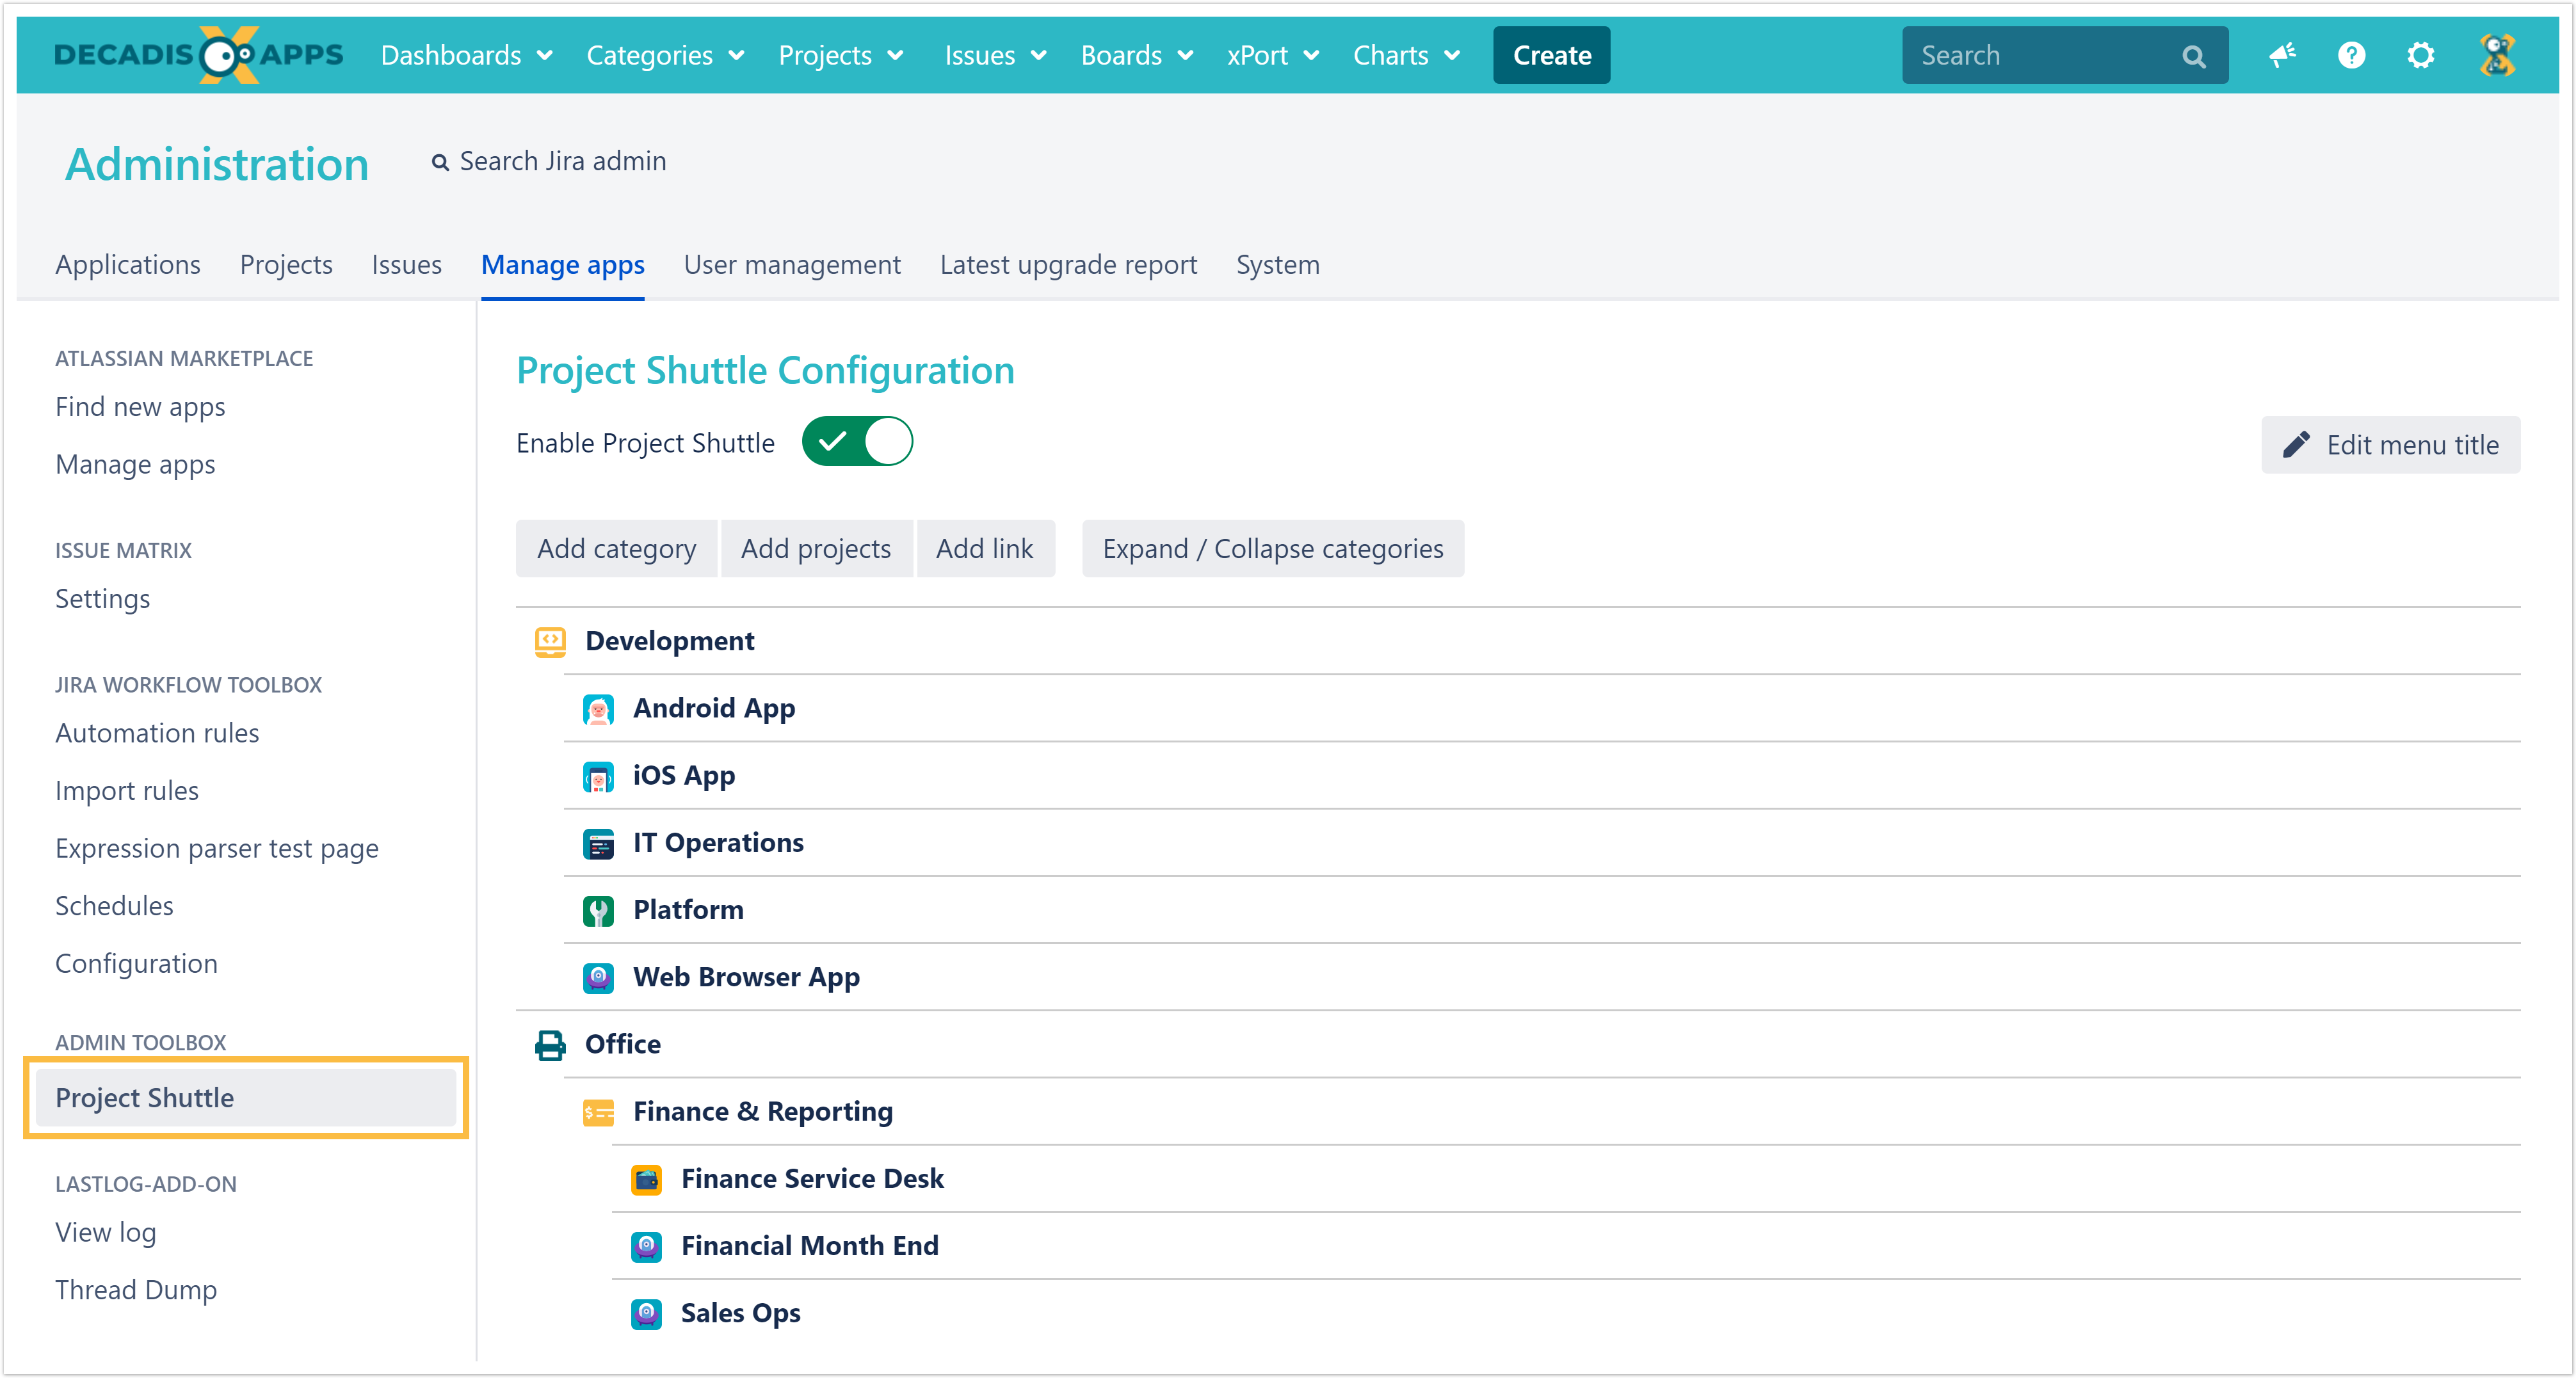
For the navigation configuration, Jira Administrator permissions are required.
The Project Shuttle can be set up via Jira administration → Manage apps → Project Shuttle
SINCE VERSION 2.9.2
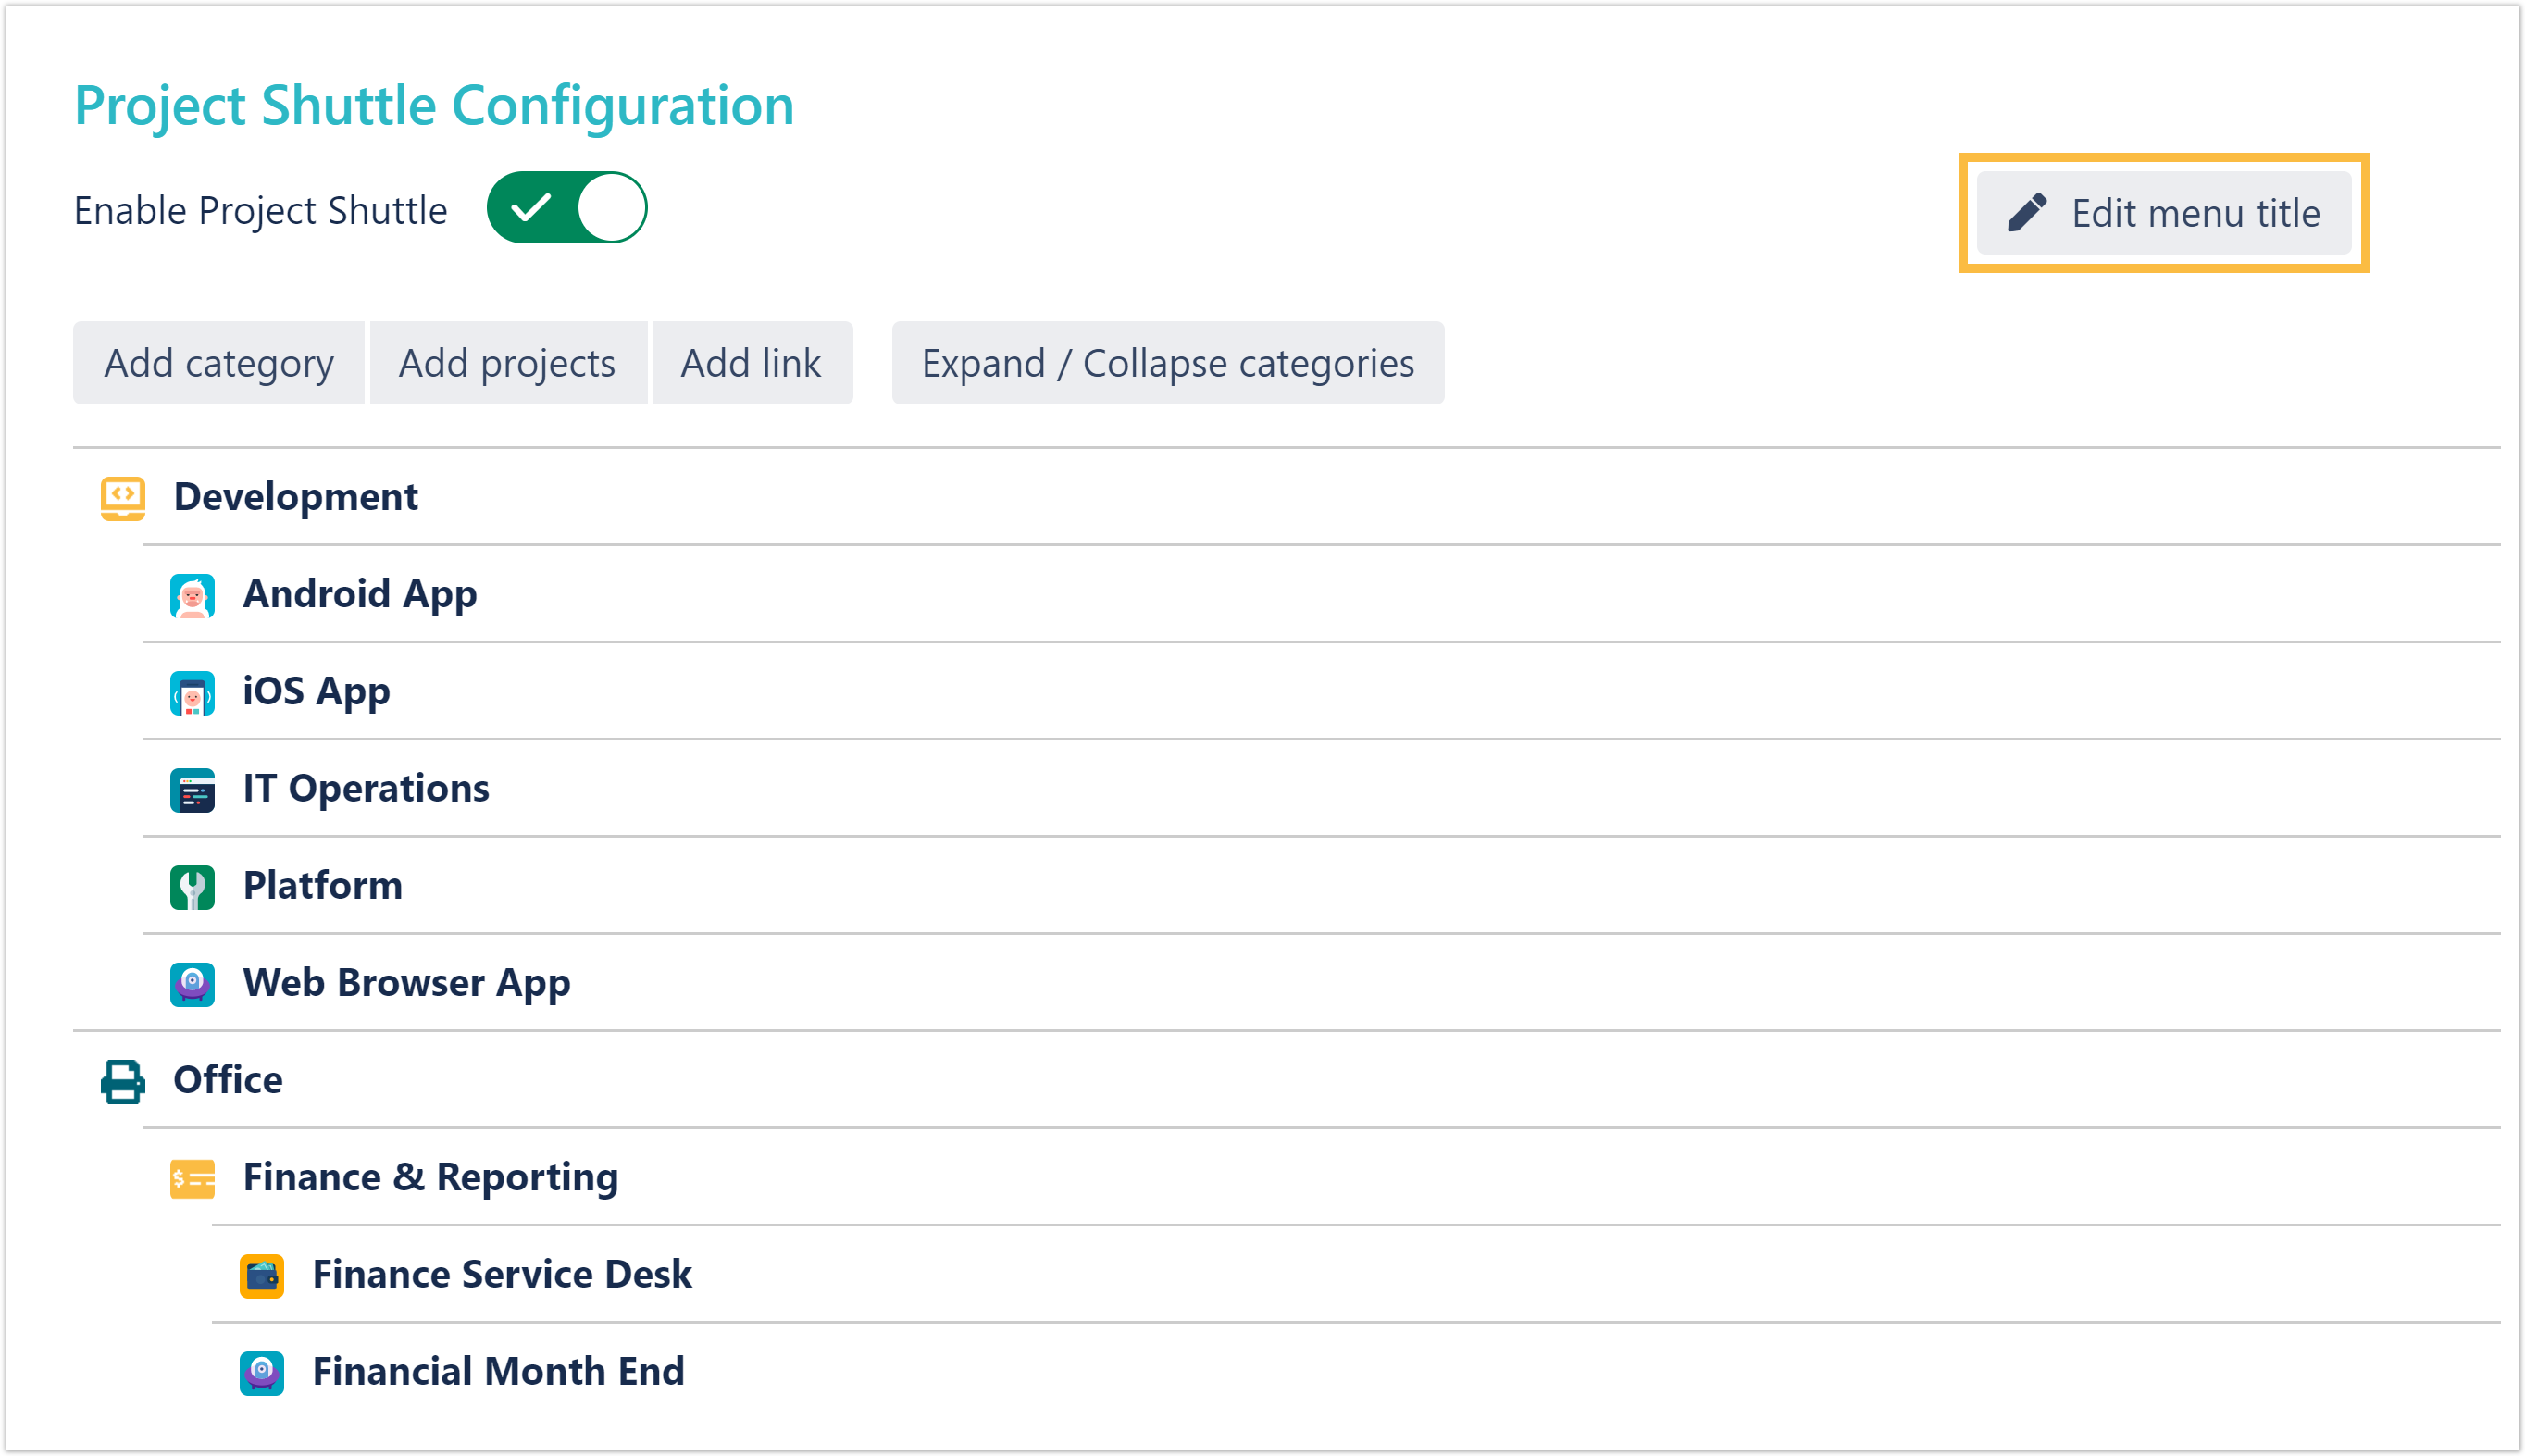
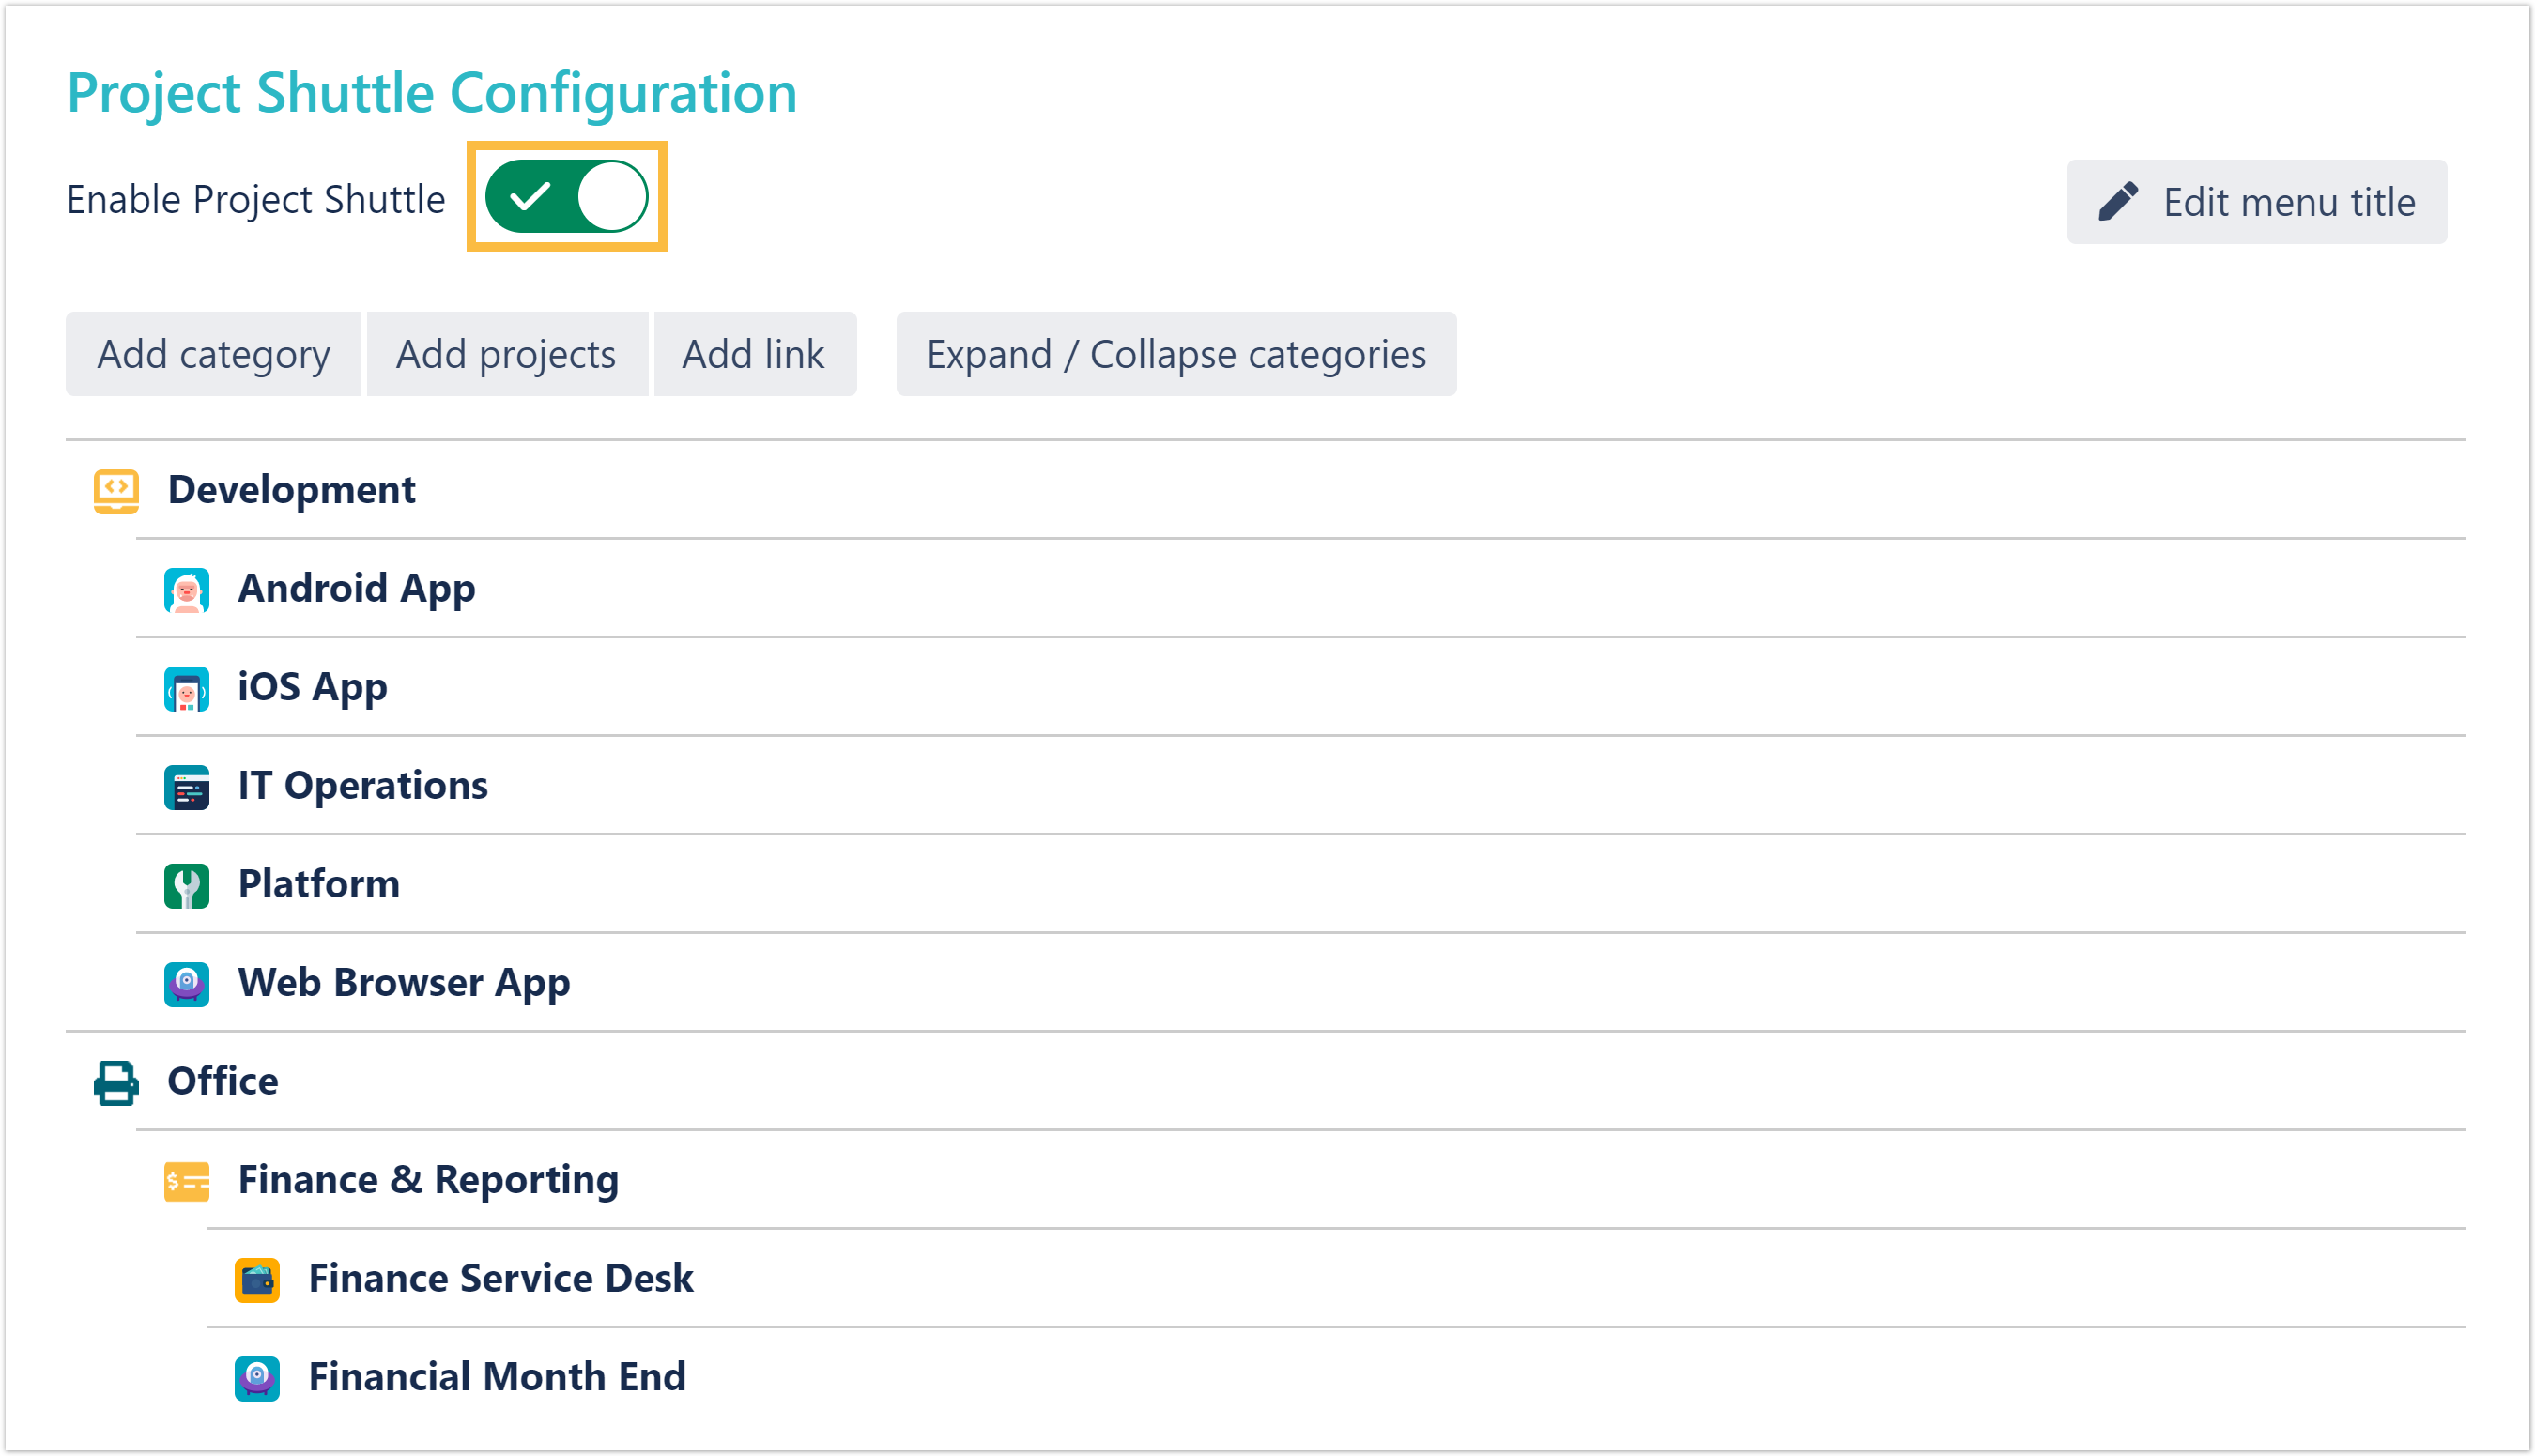
By default, the project shuttle can be found in the main toolbar as "Categories".
This can also be easily customized by hitting the Edit menu title button in the upper right corner!
In the opening popup you can enter any text. Even emojis!
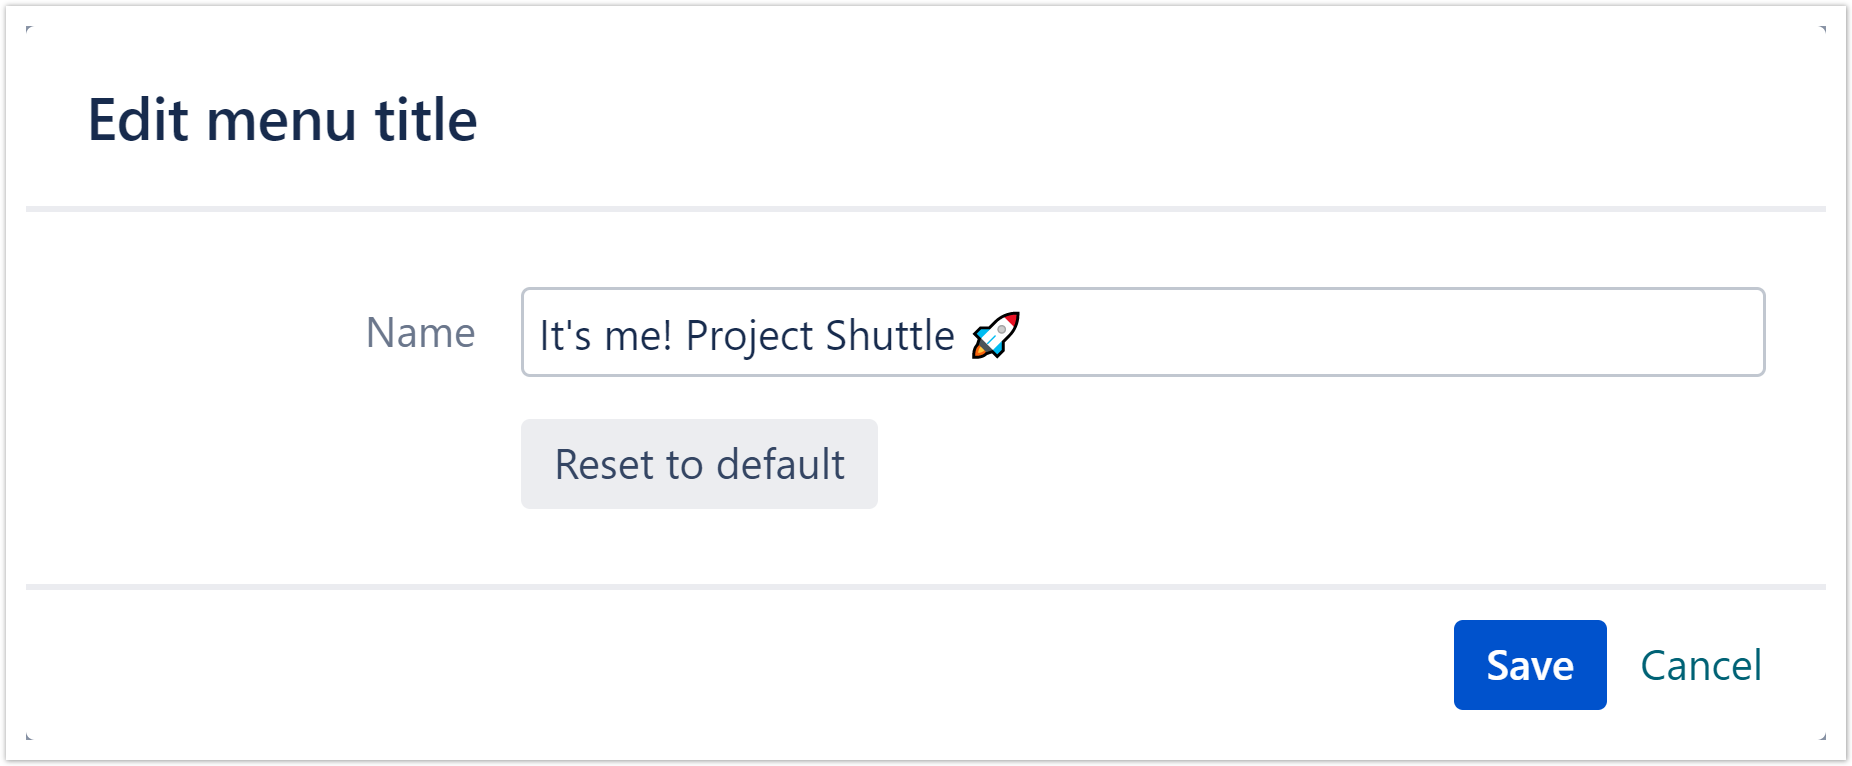
Once saved, the new title will be directly visible for all users

Categories can be used to group your projects and links like shown on the previous screenshots.
To add a new category, head over to Administration → Manage apps → Project Shuttle and click on Add category.
a name has to be set. Optionally, a parent category and an icon can be selected.
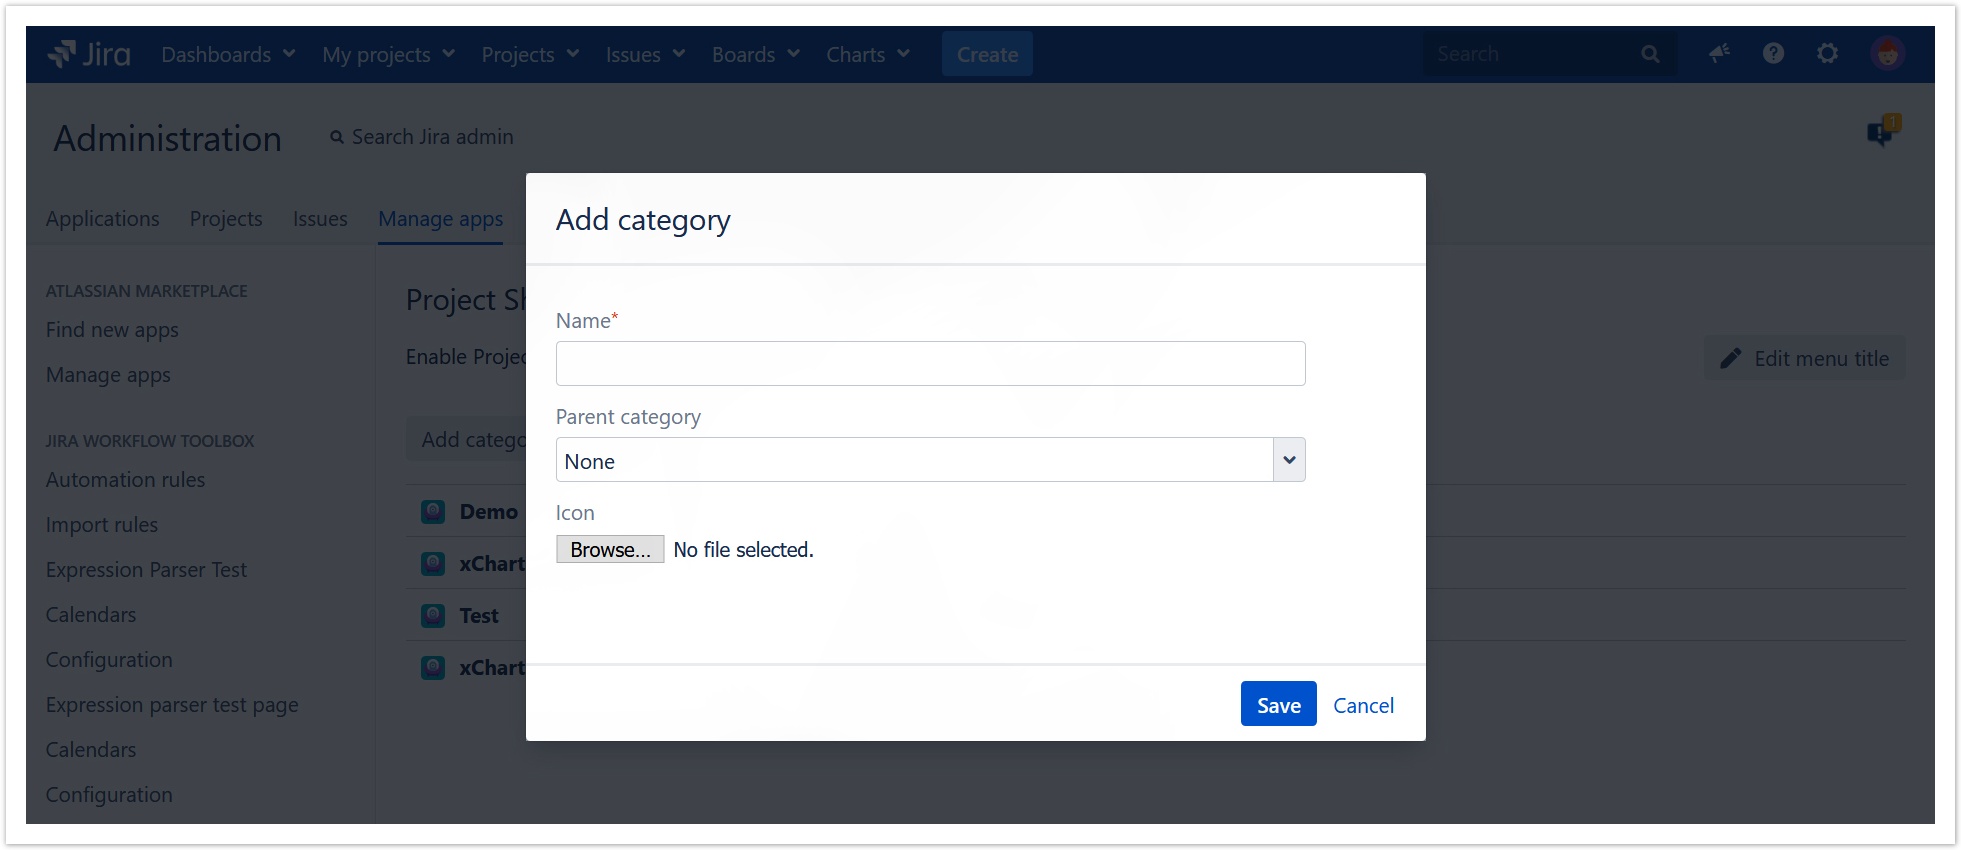
The category will now be shown in the list.
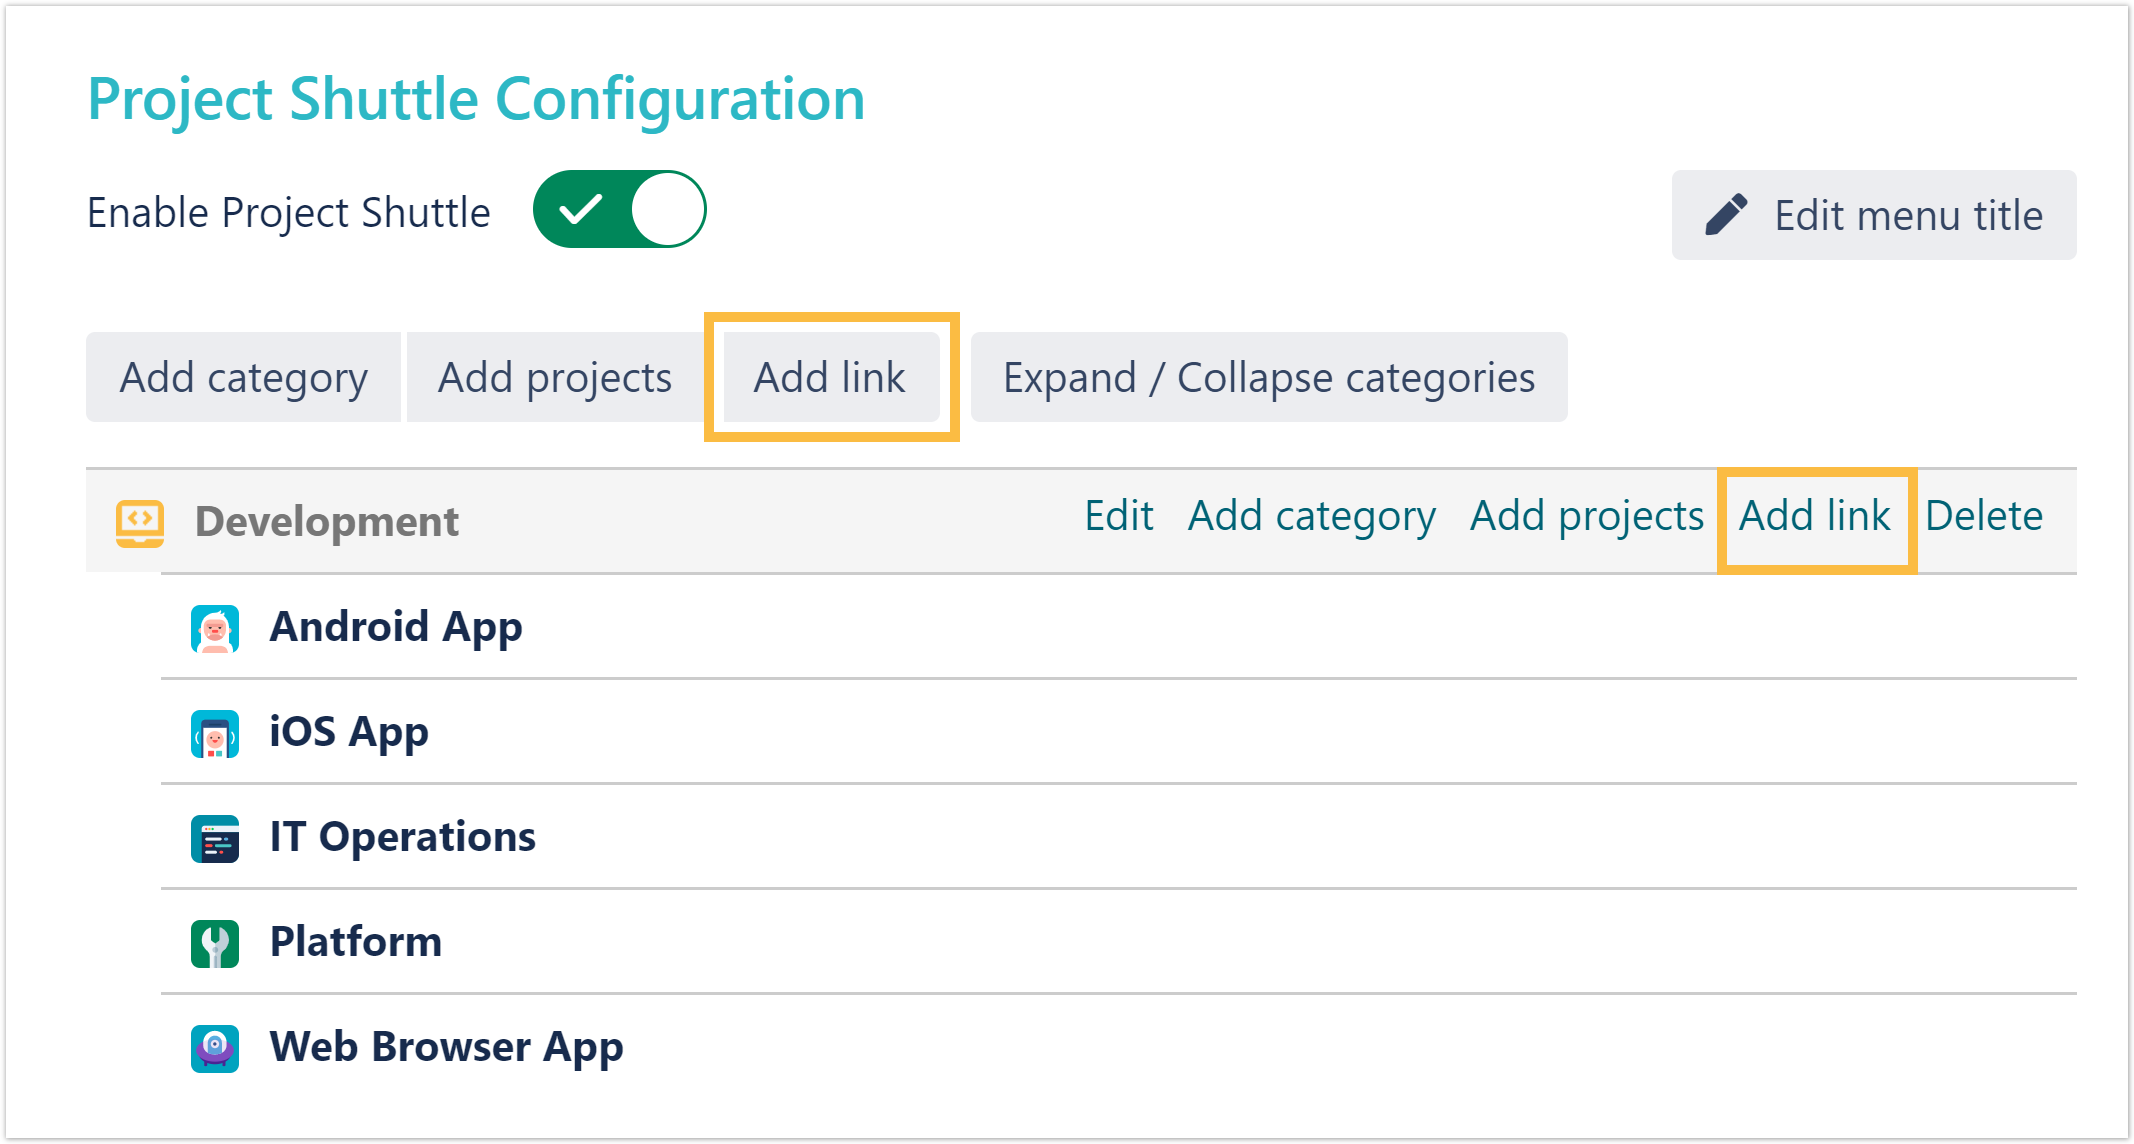
Hovering over a category will display options to Rename it, Add projects, categories, and links to it or Delete it.
After hovering over a category and clicking Add projects, projects can be selected and added to the category.
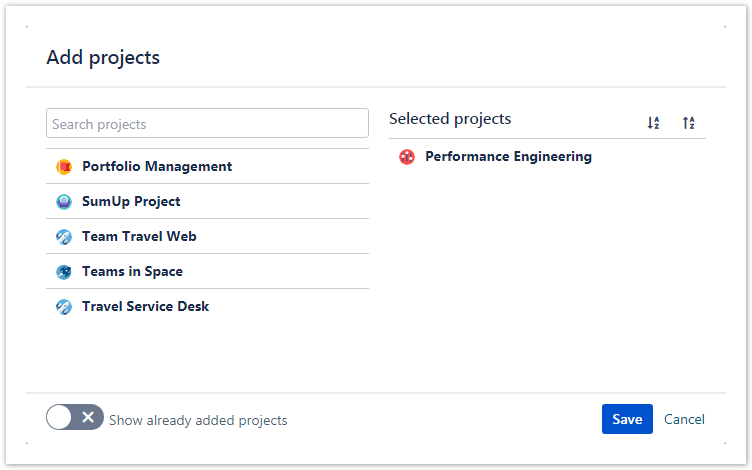
Projects on the left side can be added. Projects on the right side already have been added and can be deleted by hovering over the specific one and clicking "Remove".
Enabling the option to Show already added projects will optionally list all available projects, even those that are already used in the Project Shuttle.
Selecting the Expand/ Collapse categories button will hide/show all projects being used in categories. This feature simplifies the navigation and sorting.

SINCE VERSION 2.6.2 URLs can be added to the navigation in the Project Shuttle. Adding links is done similarly to adding projects. They can be added to the top level of the navigation or to categories as shown in the screenshot:
See an example of how configured URLs look like in the Project Shuttle navigation:
The Project Shuttle can be globally enabled/disabled. If disabled, the configuration is still available to administrators but the menu in the toolbar will be hidden.
If you still have questions, feel free to refer to our support team.