Page History
| Page properties | ||||||||||||||||||||||||||||||||||||||
|---|---|---|---|---|---|---|---|---|---|---|---|---|---|---|---|---|---|---|---|---|---|---|---|---|---|---|---|---|---|---|---|---|---|---|---|---|---|---|
| ||||||||||||||||||||||||||||||||||||||
|
| Panel | ||||||||||
|---|---|---|---|---|---|---|---|---|---|---|
On this page
|
| Page properties | ||||||||||||||||||||||||||||||||||||
|---|---|---|---|---|---|---|---|---|---|---|---|---|---|---|---|---|---|---|---|---|---|---|---|---|---|---|---|---|---|---|---|---|---|---|---|---|
| ||||||||||||||||||||||||||||||||||||
|
| UI Text Box | ||||
|---|---|---|---|---|
| ||||
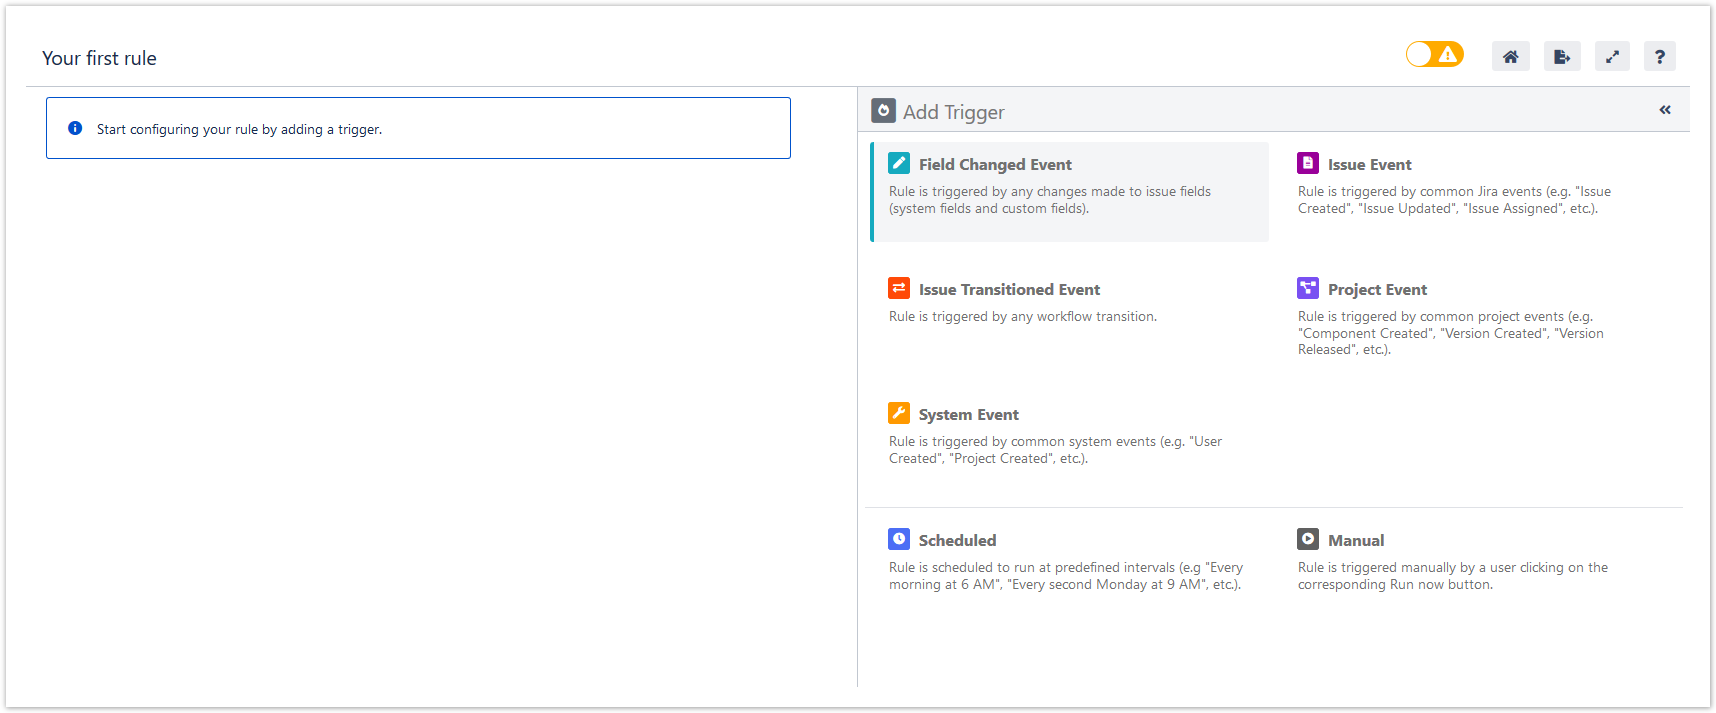
A very basic rule only consists of two elements: a trigger (mostly a Jira event like an issue update) that kicks off the rule and an action (like adding a comment) that will be performed automatically. Optionally you can further refine your rule by configuring selectors and conditions. |
| UI Expand | |||||||||||||||||||||||||||||||||||||||
|---|---|---|---|---|---|---|---|---|---|---|---|---|---|---|---|---|---|---|---|---|---|---|---|---|---|---|---|---|---|---|---|---|---|---|---|---|---|---|---|
| |||||||||||||||||||||||||||||||||||||||
|
Edit a rule
Once you have created a rule, you can edit its name, its description and its elements.
The name and description can be updated at any time. If you want to update any configuration element you need to disable the rule first.
| UI Text Box | ||
|---|---|---|
| ||
Disable the rule by clicking on the Disable button |
| UI Expand | ||
|---|---|---|
| ||
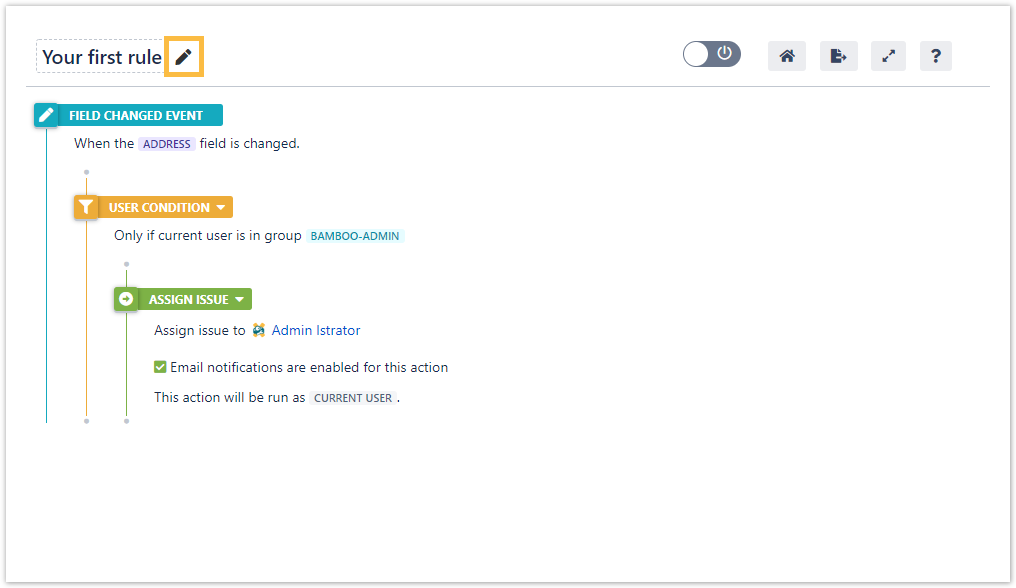
Click on the edit button next to the rule's name to edit its name and its description.
|
| UI Expand | |||||
|---|---|---|---|---|---|
| |||||
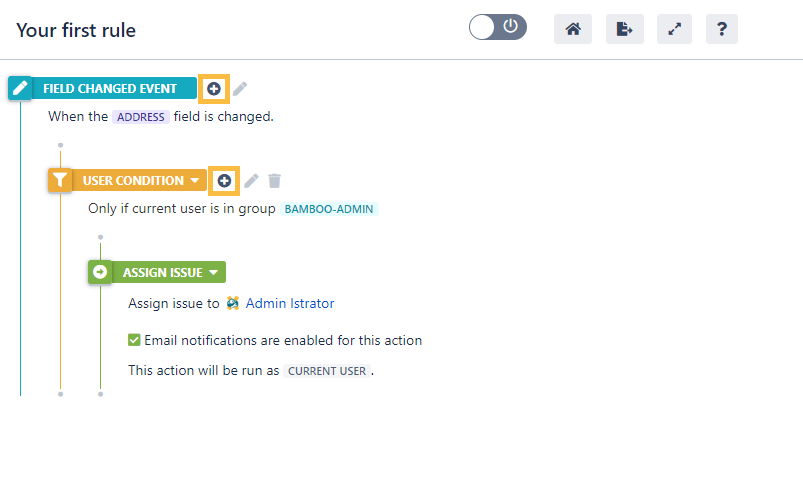
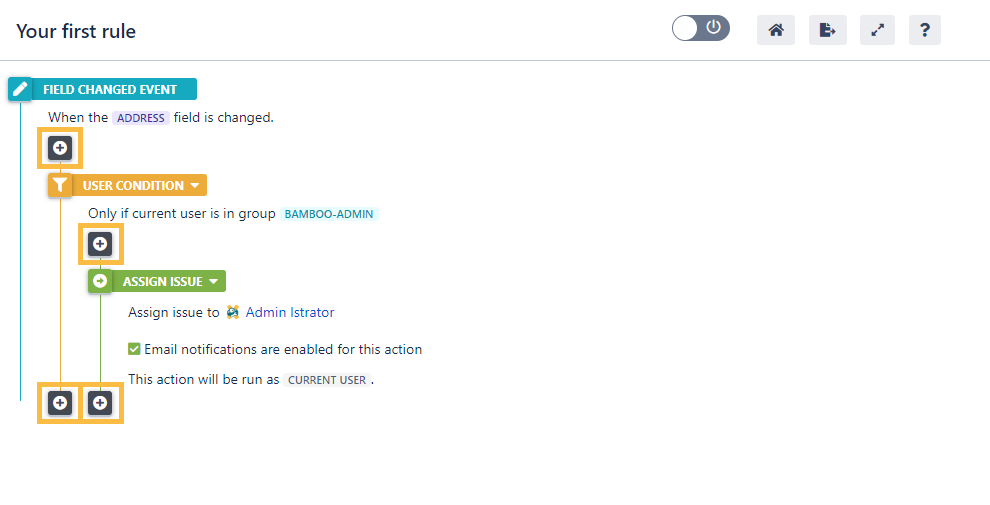
Click on the add button next to any desired element to add a new one. The button will be visible once you hover over an element.
|
| UI Expand | |||||
|---|---|---|---|---|---|
| |||||
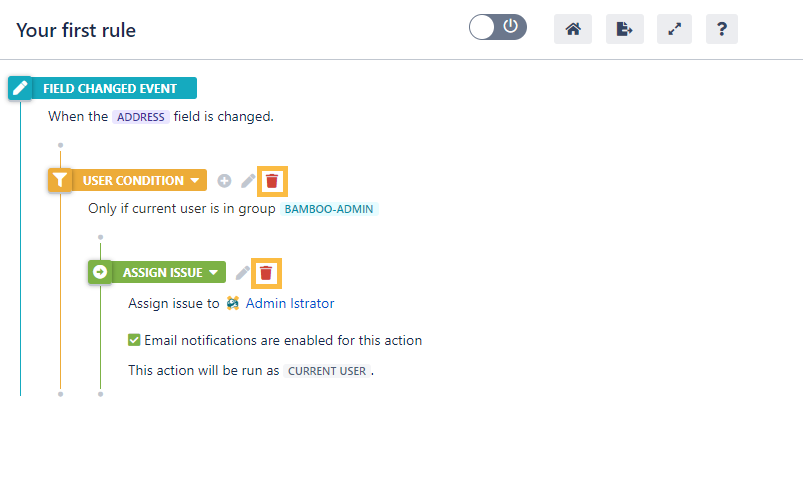
Click on the delete button next to the element you want to delete from the rule.
|
| UI Expand | ||
|---|---|---|
| ||
You can add elements under or next to existing elements. JWT will respect the hierarchy and the order of elements when processing the rule.
|
| Anchor | ||||
|---|---|---|---|---|
|
Useful UI hacks
Check out these fine little hacks that will make your life easier when working with rules.
| UI Expand | |||||||||||
|---|---|---|---|---|---|---|---|---|---|---|---|
| |||||||||||
When you hover over an element's name, you will notice the arrow cross symbol. This means that the element is available for drag and drop (meaning it can be moved within the rule). When starting to drag an element by clicking and holding the left mouse button, valid drop targets are marked with a + symbol.
|
| UI Expand | ||||||||||||||||
|---|---|---|---|---|---|---|---|---|---|---|---|---|---|---|---|---|
| ||||||||||||||||
Click on an element to collapse or expand it and all its nested elements.
The sidebar can be completely expanded by clicking on the expand icon in the upper right-hand corner of the sidebar for a smooth item configuration.
|
| Excerpt Include | ||||||
|---|---|---|---|---|---|---|
|
...