Page History
| Panel | ||||||||||
|---|---|---|---|---|---|---|---|---|---|---|
On this page
|
| Panel | ||||||||||||||||
|---|---|---|---|---|---|---|---|---|---|---|---|---|---|---|---|---|
| ||||||||||||||||
|

 Configuration steps
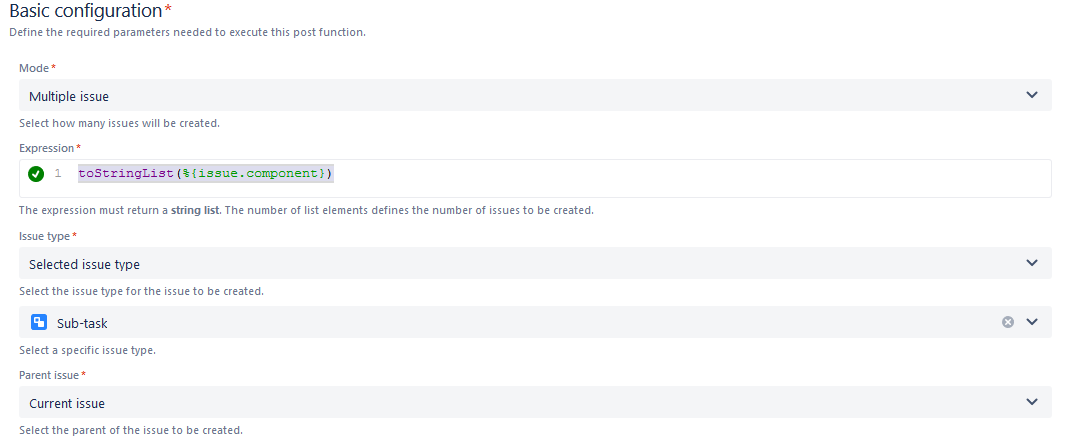
Basic configuration*
| UI Expand | ||
|---|---|---|
| ||
When you apply the example from the create issue post function in your Jira instance, it will create a single issue. |
| Code Block | ||||
|---|---|---|---|---|
| ||||
toStringList(%{issue.component}) The expression must return a string list. The number of list elements defines the number of issues to be created. |
| UI Expand | ||
|---|---|---|
| ||
The issue type is the selected issue type. i.e the issue type that is currently selected. |
| UI Expand | ||
|---|---|---|
| ||
| In the example given on the left, we chose the "sub-task" issue type, so it will create a sub-task for the selected issue type. |
| UI Expand | |||||
|---|---|---|---|---|---|
| |||||
Here we have chosen the "Current issue" for the required field parent issue.
|
Fields*
| Code Block | ||
|---|---|---|
| ||
Summarize your issue , and you can also use field codes |
| Code Block | ||
|---|---|---|
| ||
Describe your issue, and you can also use field codes |
Additional fields
| UI Expand | ||
|---|---|---|
| ||
Choose from which issue you want to copy the remaining fields from. |
If you chose an issue to copy from you would have to choose between the following options (multi choice is possible):
- All remaining fields
- Attachments
- Comments
- Issue links
After checking if the parameters match this example you can click on add and see how the post function works.
Now that you are familiar with this post function and what it does, you can configure the parameters based on your needs.
Related examples
Page properties report firstcolumn Use case headings Type,Function, Use case description, Complexity sortBy Title cql label = "use-case" and space = currentSpace() and parent = currentContent()
If you still have questions regarding this example or others, feel free to refer to our support team.