Page History
| Page properties | |||||||
|---|---|---|---|---|---|---|---|
| |||||||
| Tech review |
| ||||||
| Style guide |
| ||||||
| Page status |
|
| Status | ||
|---|---|---|
|
| Status | ||||
|---|---|---|---|---|
|
| Status | ||||
|---|---|---|---|---|
|
| Status | ||||
|---|---|---|---|---|
|
| size | medium |
|---|---|
| type | info |
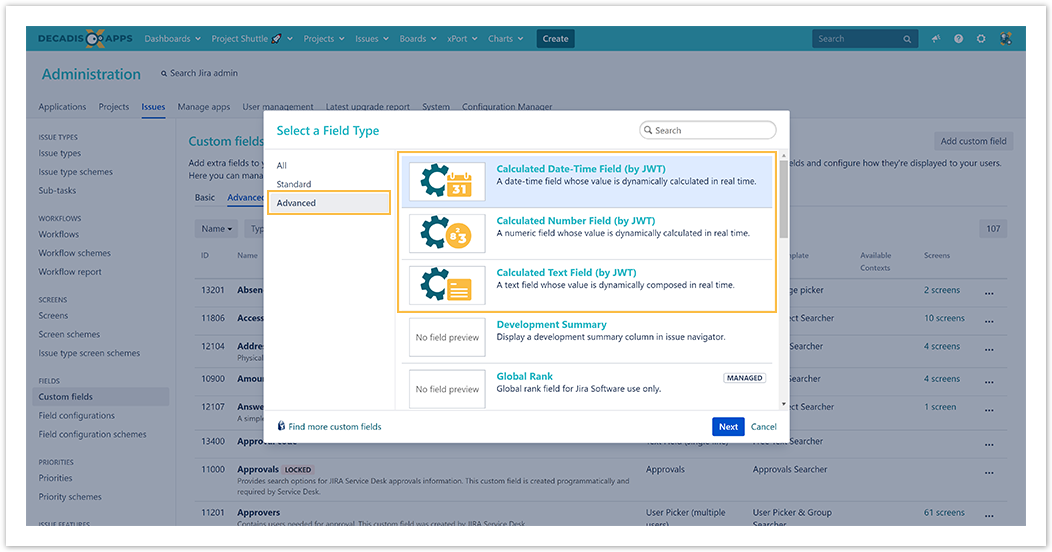
JWT ships with three custom field types to calculate field values, display live data, or even pull data from online service providers such as Google.
Each custom field type, from number to text, or date-time fields, comes with a different set of options that let you define exactly what you want to see as a result using the full power of the JWT expression editor.
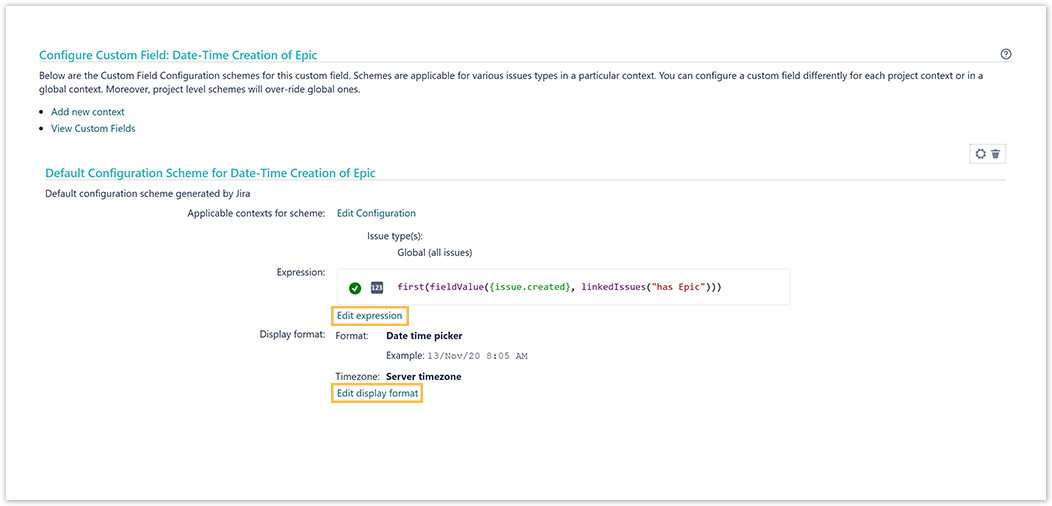
Last but not least, you can individually define how the result of the calculation should appear, from different time formats to currency symbols, by configuring individual Display formats.
 Calculated date-time fields
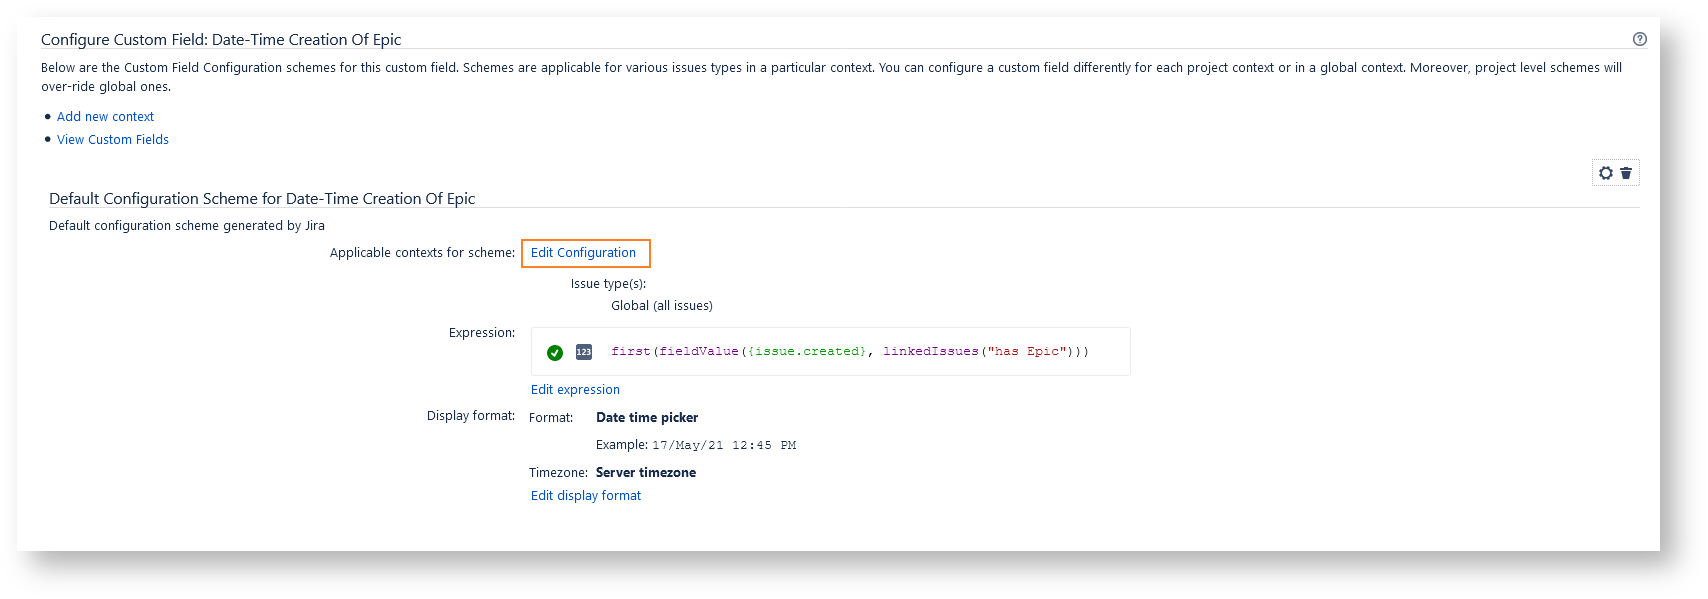
This type of read-only custom field contains a value which is dynamically calculated from a custom math/time expression. It can be used to obtain a date-time value depending on the value of the current issue or in other issues.
Calculated number fields:
This type of read-only custom field has a value which is dynamically calculated from a custom math/numeric expression. It can be used to obtain a numeric value depending on the value of other fields in the current issue or in any other issues.
Calculated text fields
This type of read-only custom field has a value which is dynamically calculated from a custom text expression. It can be used to show a text composed from one or more field values returned by field codes.
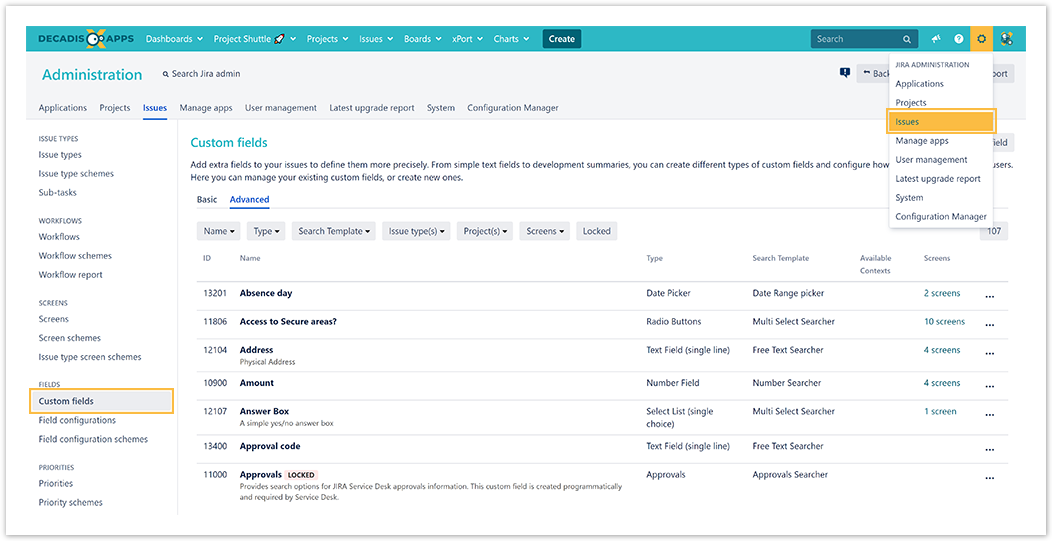
First steps
| UI Steps | |||||||||
|---|---|---|---|---|---|---|---|---|---|
|
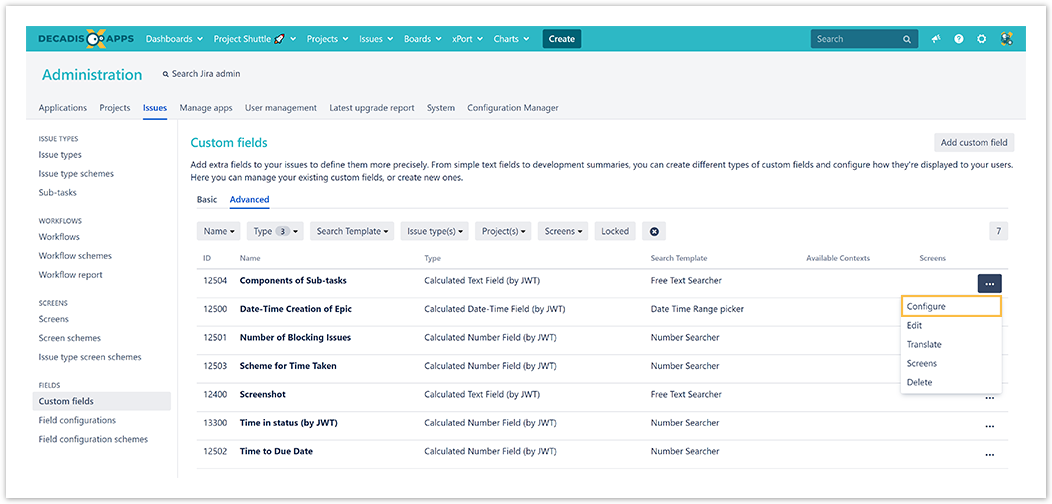
Configure your custom field
| UI Steps | |||||||||||||||||||||||||||||||
|---|---|---|---|---|---|---|---|---|---|---|---|---|---|---|---|---|---|---|---|---|---|---|---|---|---|---|---|---|---|---|---|
|


| UI Text Box | ||
|---|---|---|
| ||
Been there, done that? If you need even more inspiration, make sure to check out these useful use cases that will definitely get you started. |
| Excerpt Include | ||||||
|---|---|---|---|---|---|---|
|