On this page
What is JWT?
The way tasks and processes are managed in Jira is through workflows. A workflow maps out the statuses an issue can go through and the available transitions between the statuses that together define your entire process.
You can edit the overall workflow used in a project, or modify the way particular issue types are handled in the workflow. But: At some point, you might end up stuck in the middle of nowhere because of feature limitations.
At this point, Jira Workflow Toolbox (JWT) for Jira Cloud comes in handy!
JWT for Jira Cloud enhances the way you configure workflows. It extends the native functionality by offering custom conditions, validators, and post functions.
Classic projects only!
Next-gen projects are the newest projects in Jira Software Cloud. They are perfect for small, autonomous teams that want to quickly jump in and get started, without the need for a Jira admin.
Due to the nature of next-gen projects all workflow related enhancements provided by JWT for Jira Cloud are only available for workflows being managed in classic projects.
 Installing the app
Installing Jira Workflow Toolbox is simple and does not differ from the installation of any other Jira apps. More information on managing apps can be found in the Atlassian documentation.
You must be a Jira administrator to be able to install any app.
 Get started with JWT in 2 minutes!
Check out the screencast and see, how you can set up JWT and start using the app within 2 minutes.
 User interface
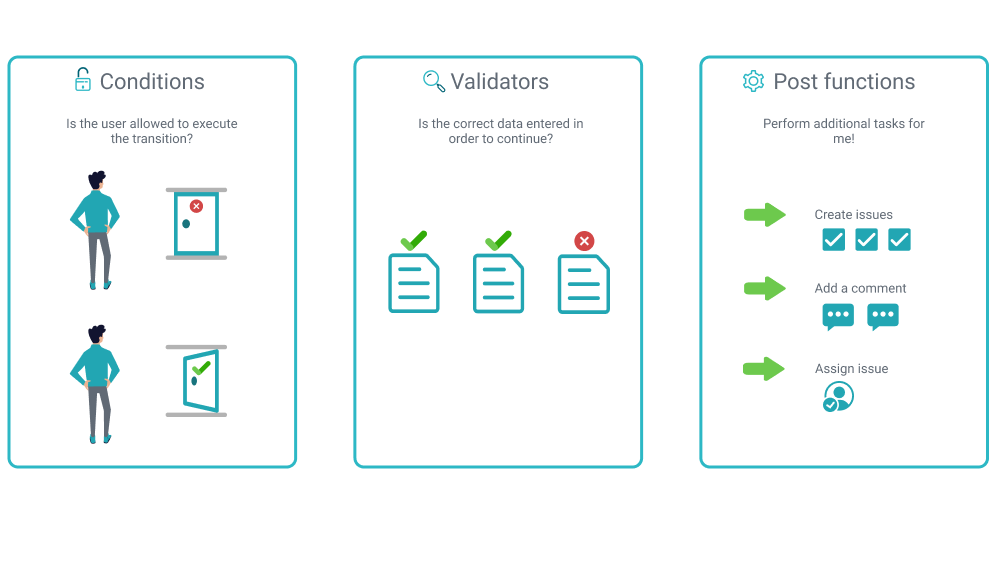
All workflow functions provided by JWT for Jira Cloud are divided into three areas in the user interface.
Every workflow function consists of multiple configurable fields. Mandatory fields are marked with a red asterisk (*) and are essential for the correct operation of the function.
The number of available fields depend on the function. Make sure to check out all available fields referenced by their corresponding field codes.
A configuration from one of the built-in usage examples should look like this:
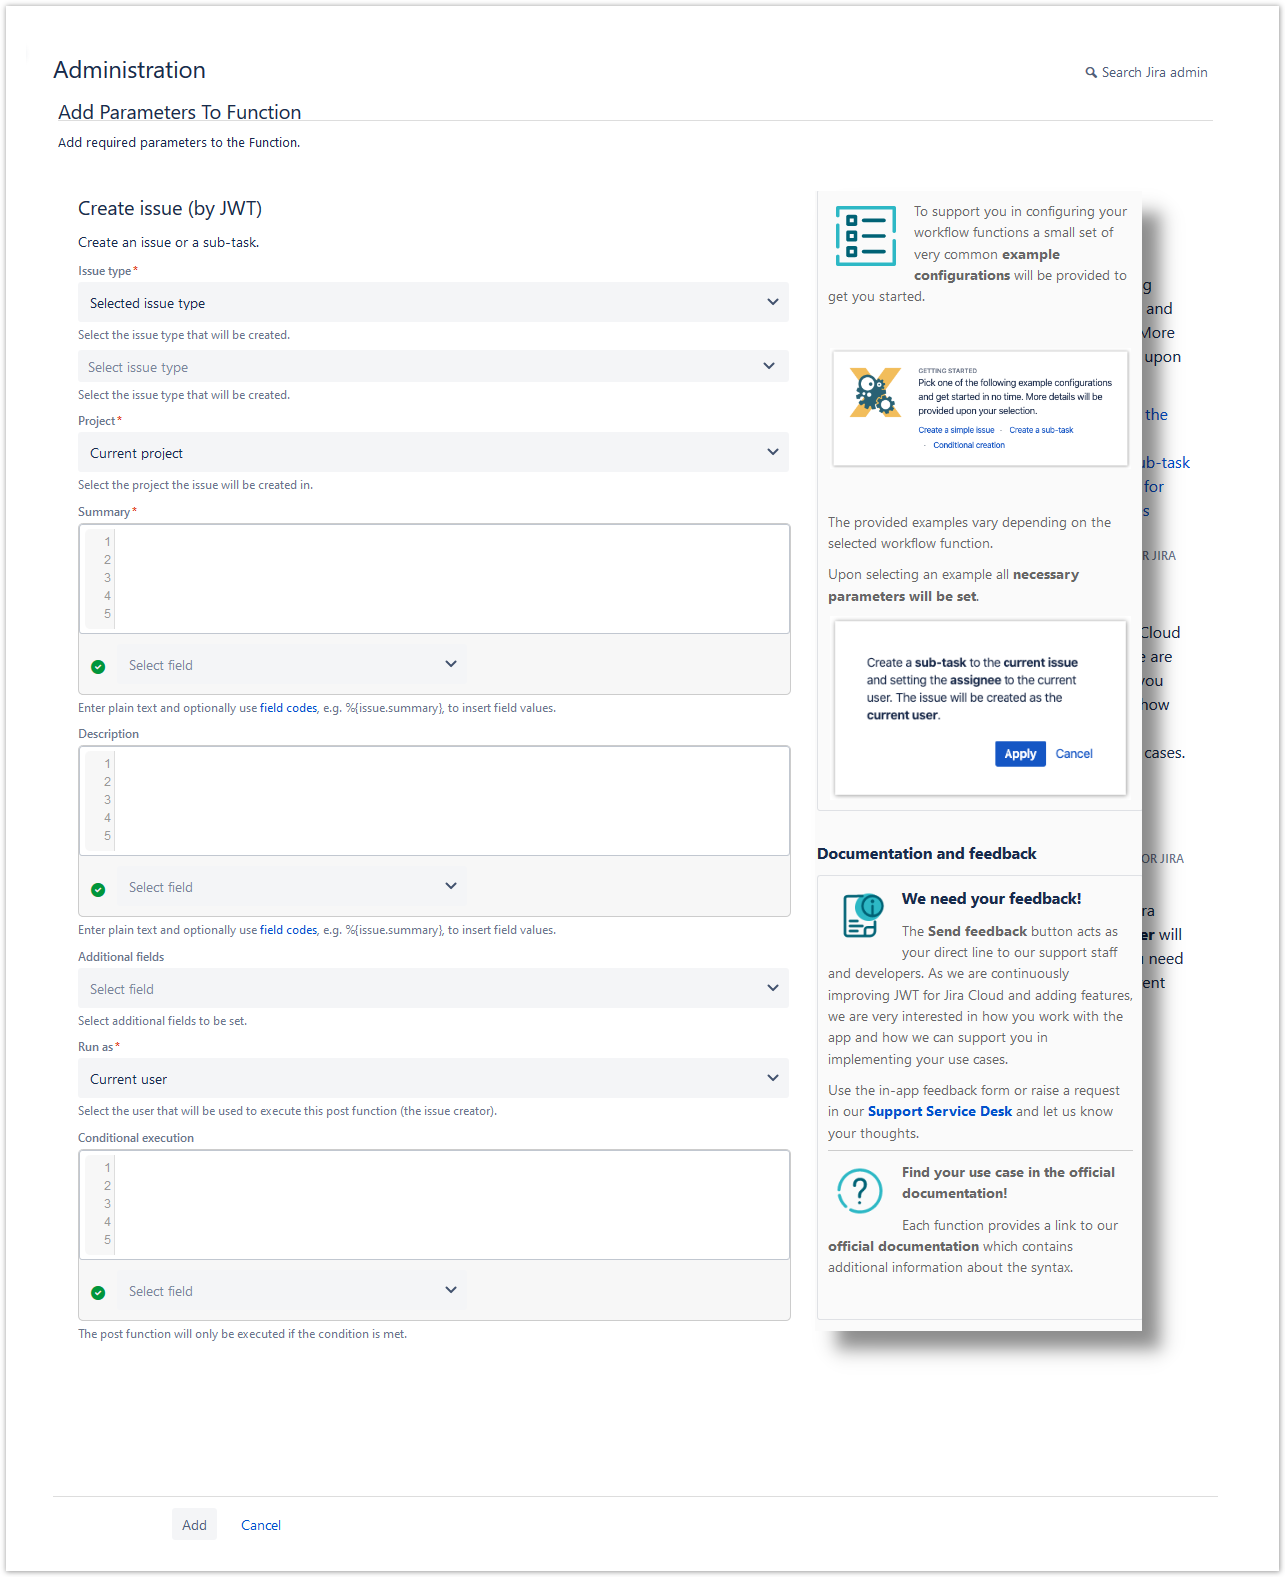
This example will create a sub-task under the current issue and set the assignee to the current user.