Jira is a perfect issue tracker but staying on top of essential project data is tedious, if not impossible using just built-in functionalities. sumUp for Jira Cloud is filling this void by offering a lightweight but powerful solution to aggregate your data on dashboards with just a few clicks.
sumUp for Jira Cloud extends the built-in Jira reporting capabilities by adding four essential and highly configurable dashboard gadgets. The new gadgets combine the familiar use and functionality of selected system gadgets with extended real-time calculation features such as:
- Grouping issues by field values to make your data shine even more.
- Extended custom field support for additional fields to display.
- The flexibility to use JQL queries instead of saved filters in the gadget configuration to avoid the need of managing filter permissions.
Installing sumUp for Jira Cloud is straightforward:
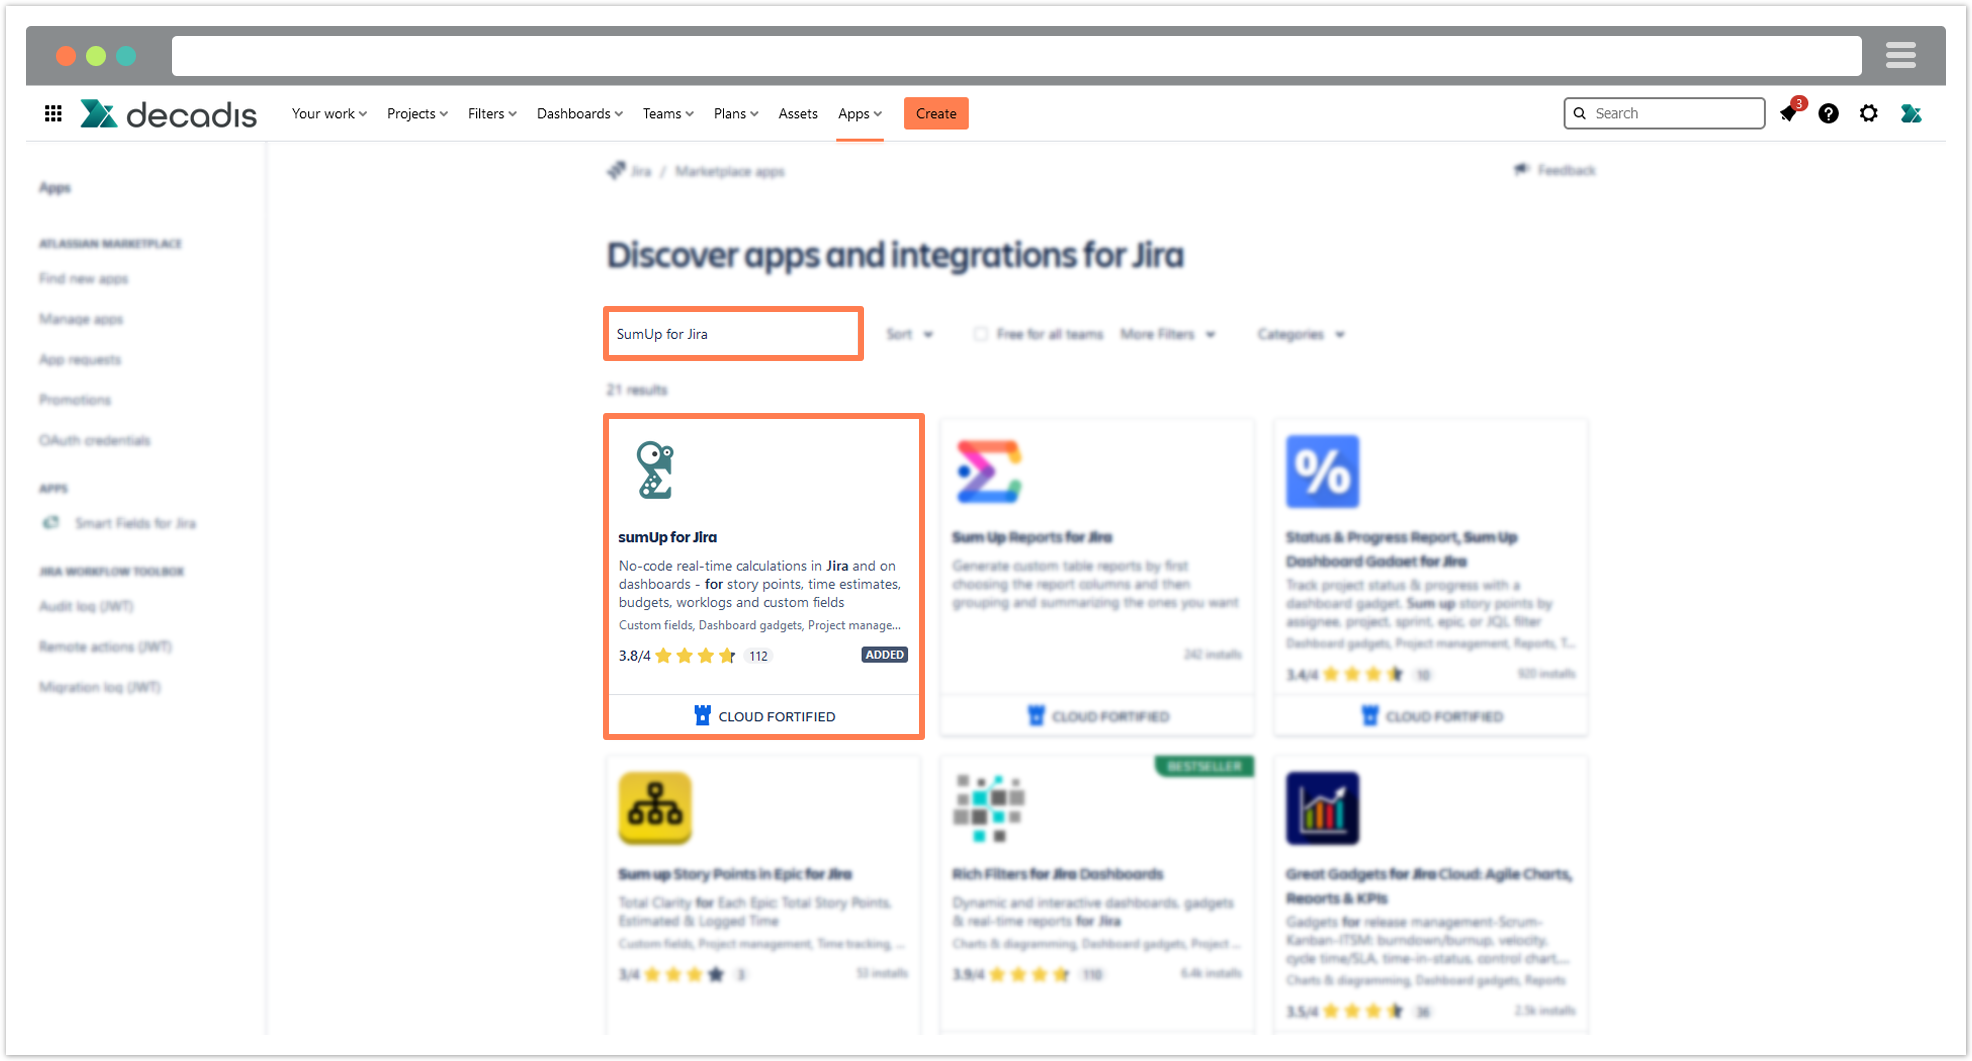
- Get the sumUp app from the Atlassian marketplace
- Add sumUp for Jira Cloud directly from your UPM:
Head over to Apps → Explore more apps.
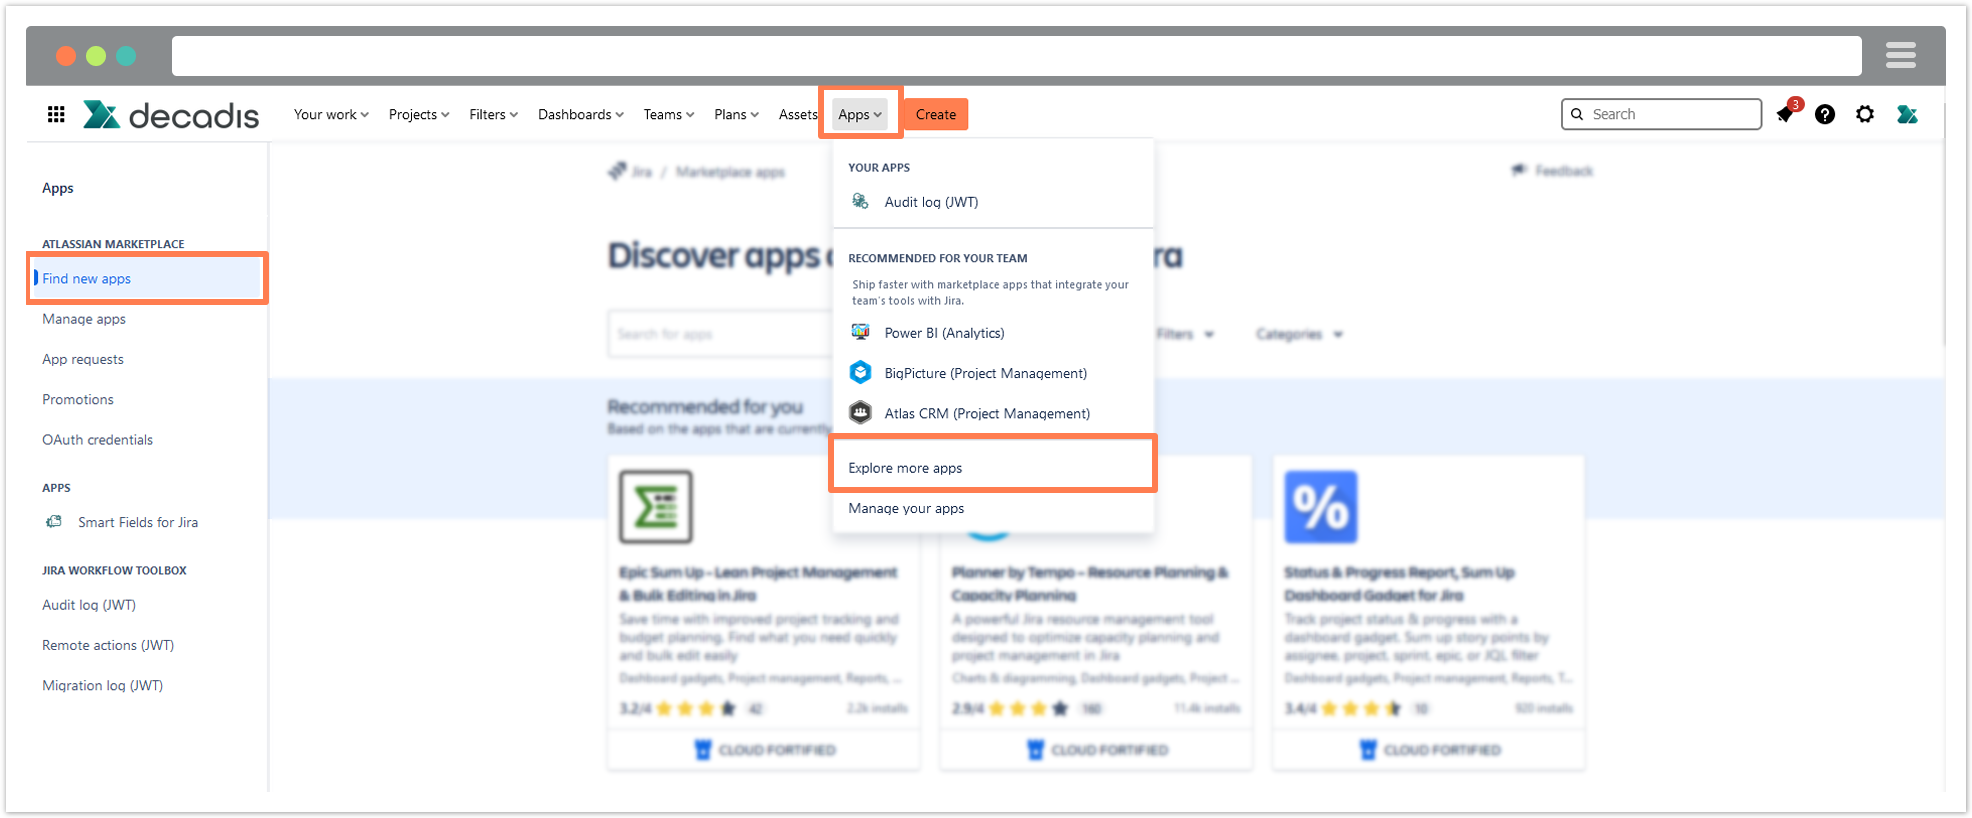
Search for sumUp.
Have a look at First steps to start customizing your gadgets.
If you still have questions, feel free to refer to our support team.
After installing the app, simply head over to any dashboard you own or create a new one.
Create
To create a new dashboard, head over to Dashboards → Create dashboard
In the pop-up window give a name to the dashboard, a description (optional), and the viewing and editing user lists, then click on save.
Edit dashboard
On the upper right side of your dashboard click on the ellipsis menu ... to display the options you can use to edit and configure your dashboard.
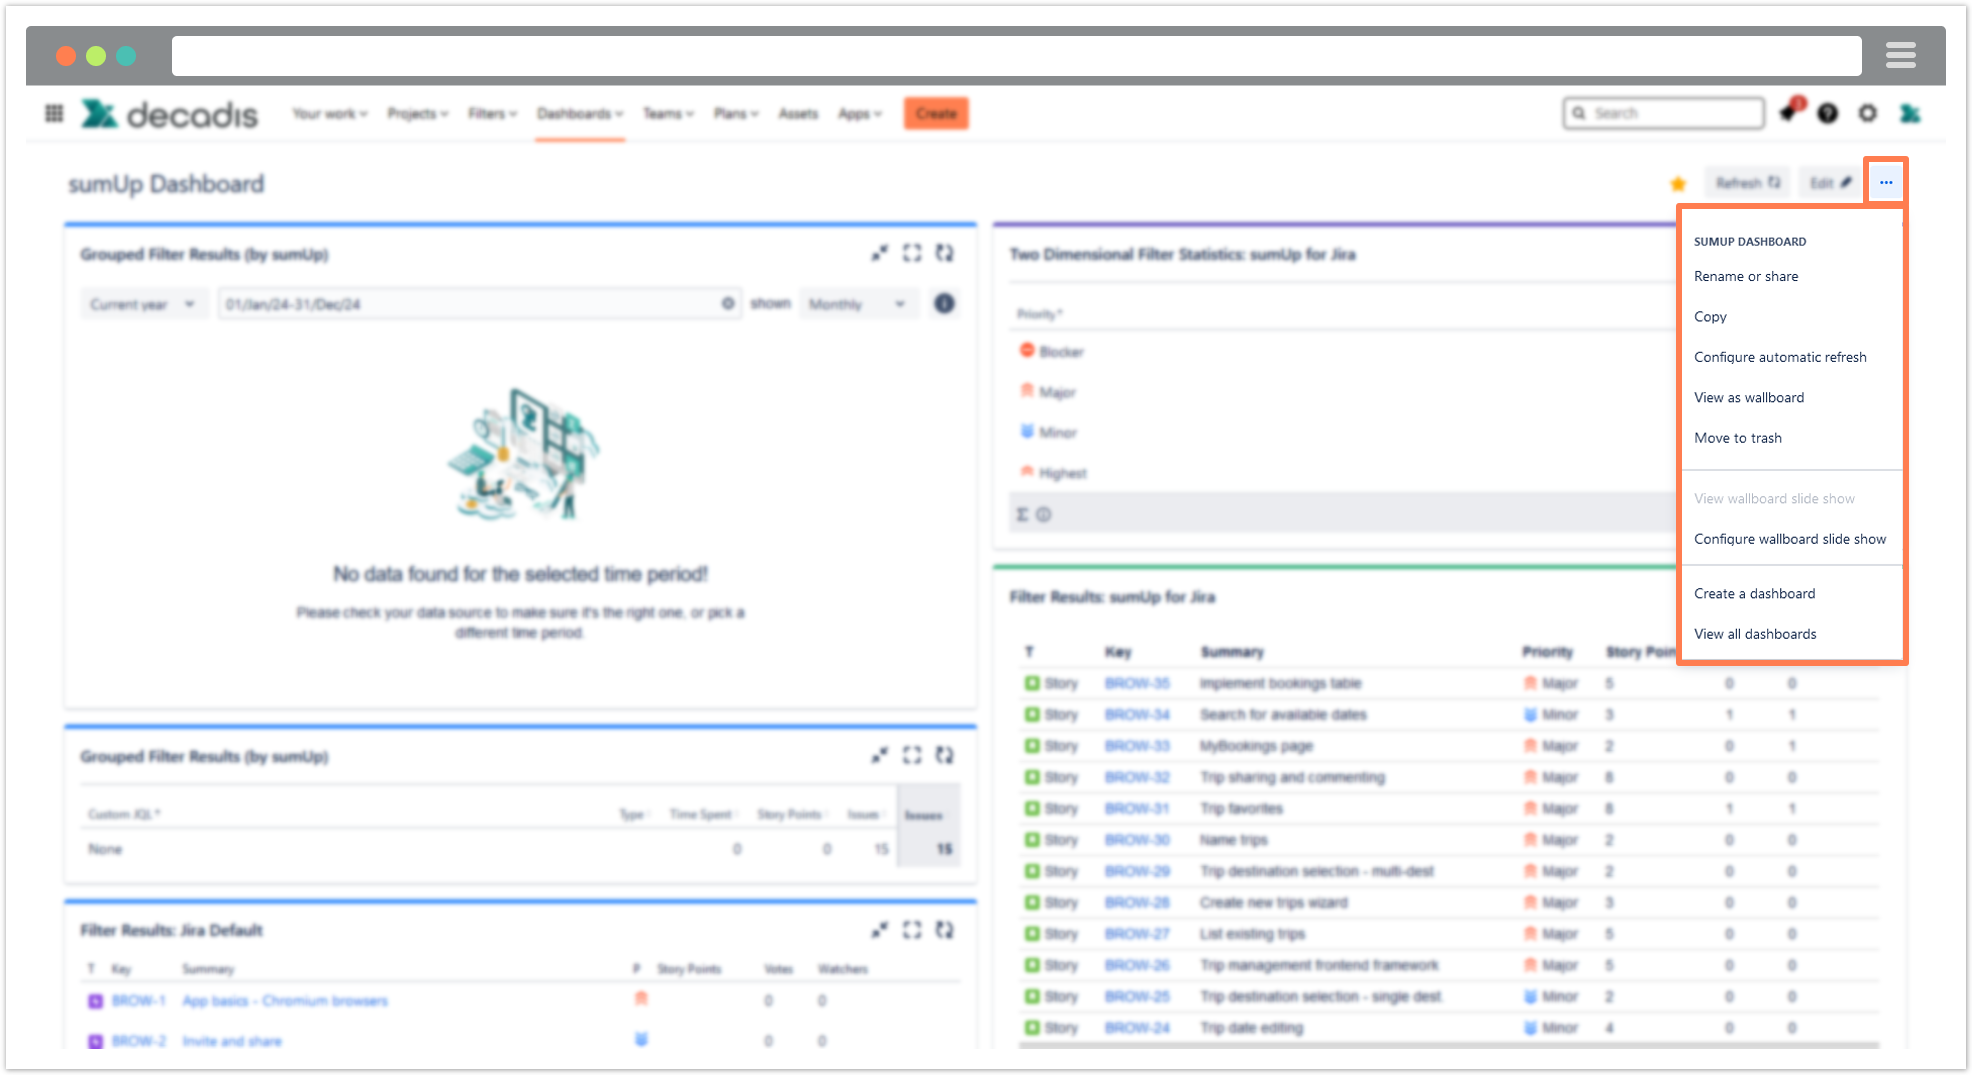
Edit and share
In the pop-up window give a name to the dashboard, a description (optional), and the viewing and editing user lists, then click on save.
Copy
Make a copy of the desired dashboard and give it a name and a description like when creating a new one except that this one would have a copy of content from the original dashboard.
View as wallboard
This gives you a better view of your dashboard in one full screen view
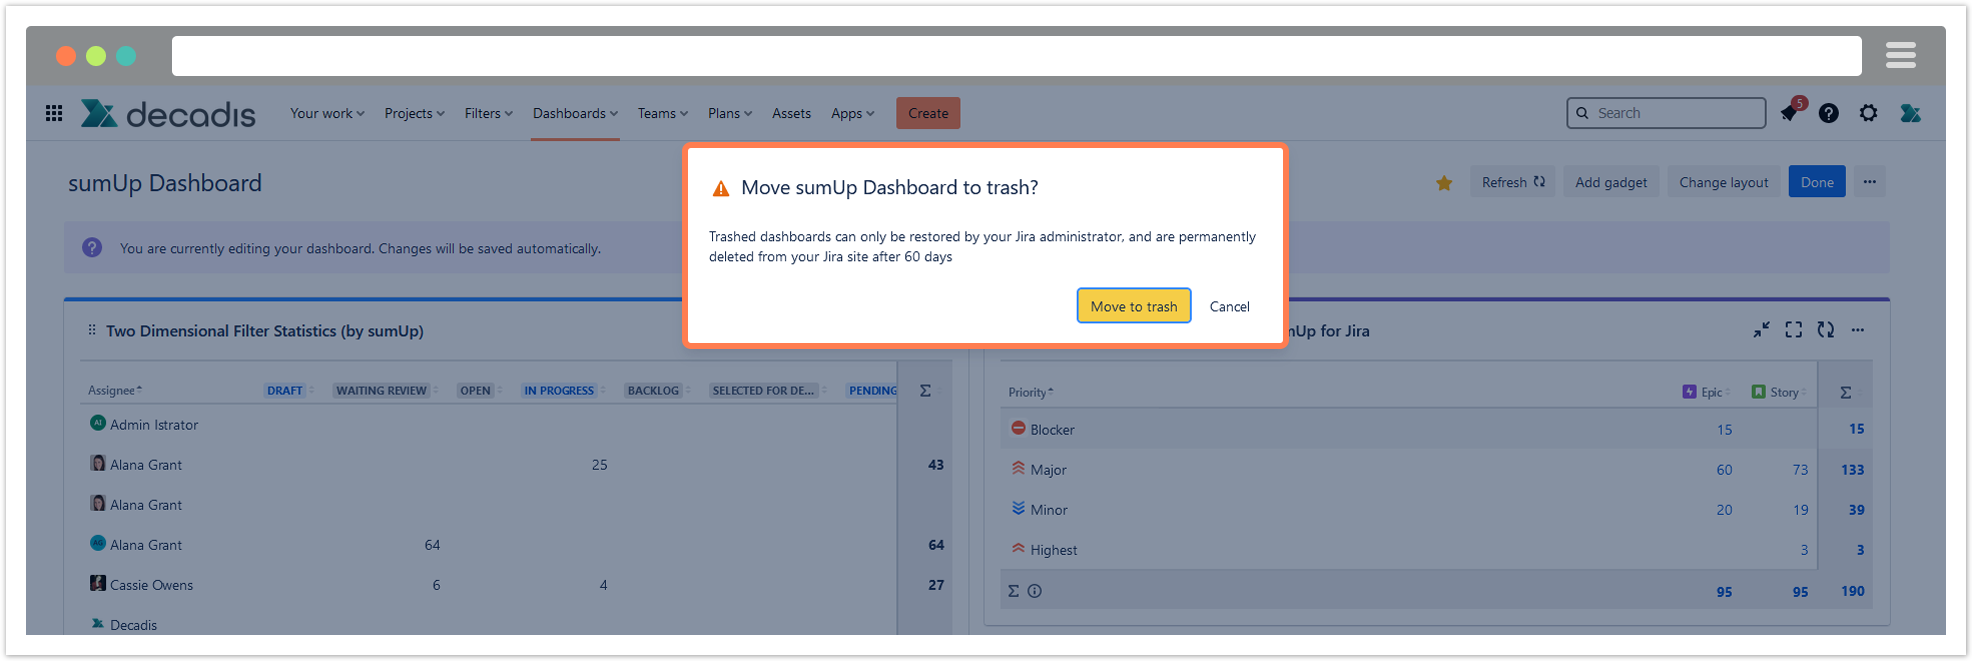
Delete
This option permanently deletes your dashboard. A confirmation pop-up message will appear when you click on delete to double check if you want to proceed.
Wallboard slide show
You need to configure a wallboard slide show before viewing it.
In the configure wallboard
Add at least two dashboards to display
Choose the desired transition effect (could be also set to none)
Set how many seconds it takes to change the dashboard display, then click on save.
Click on view wallboard slide show to see your results.
Press Esc to exit the slide show.
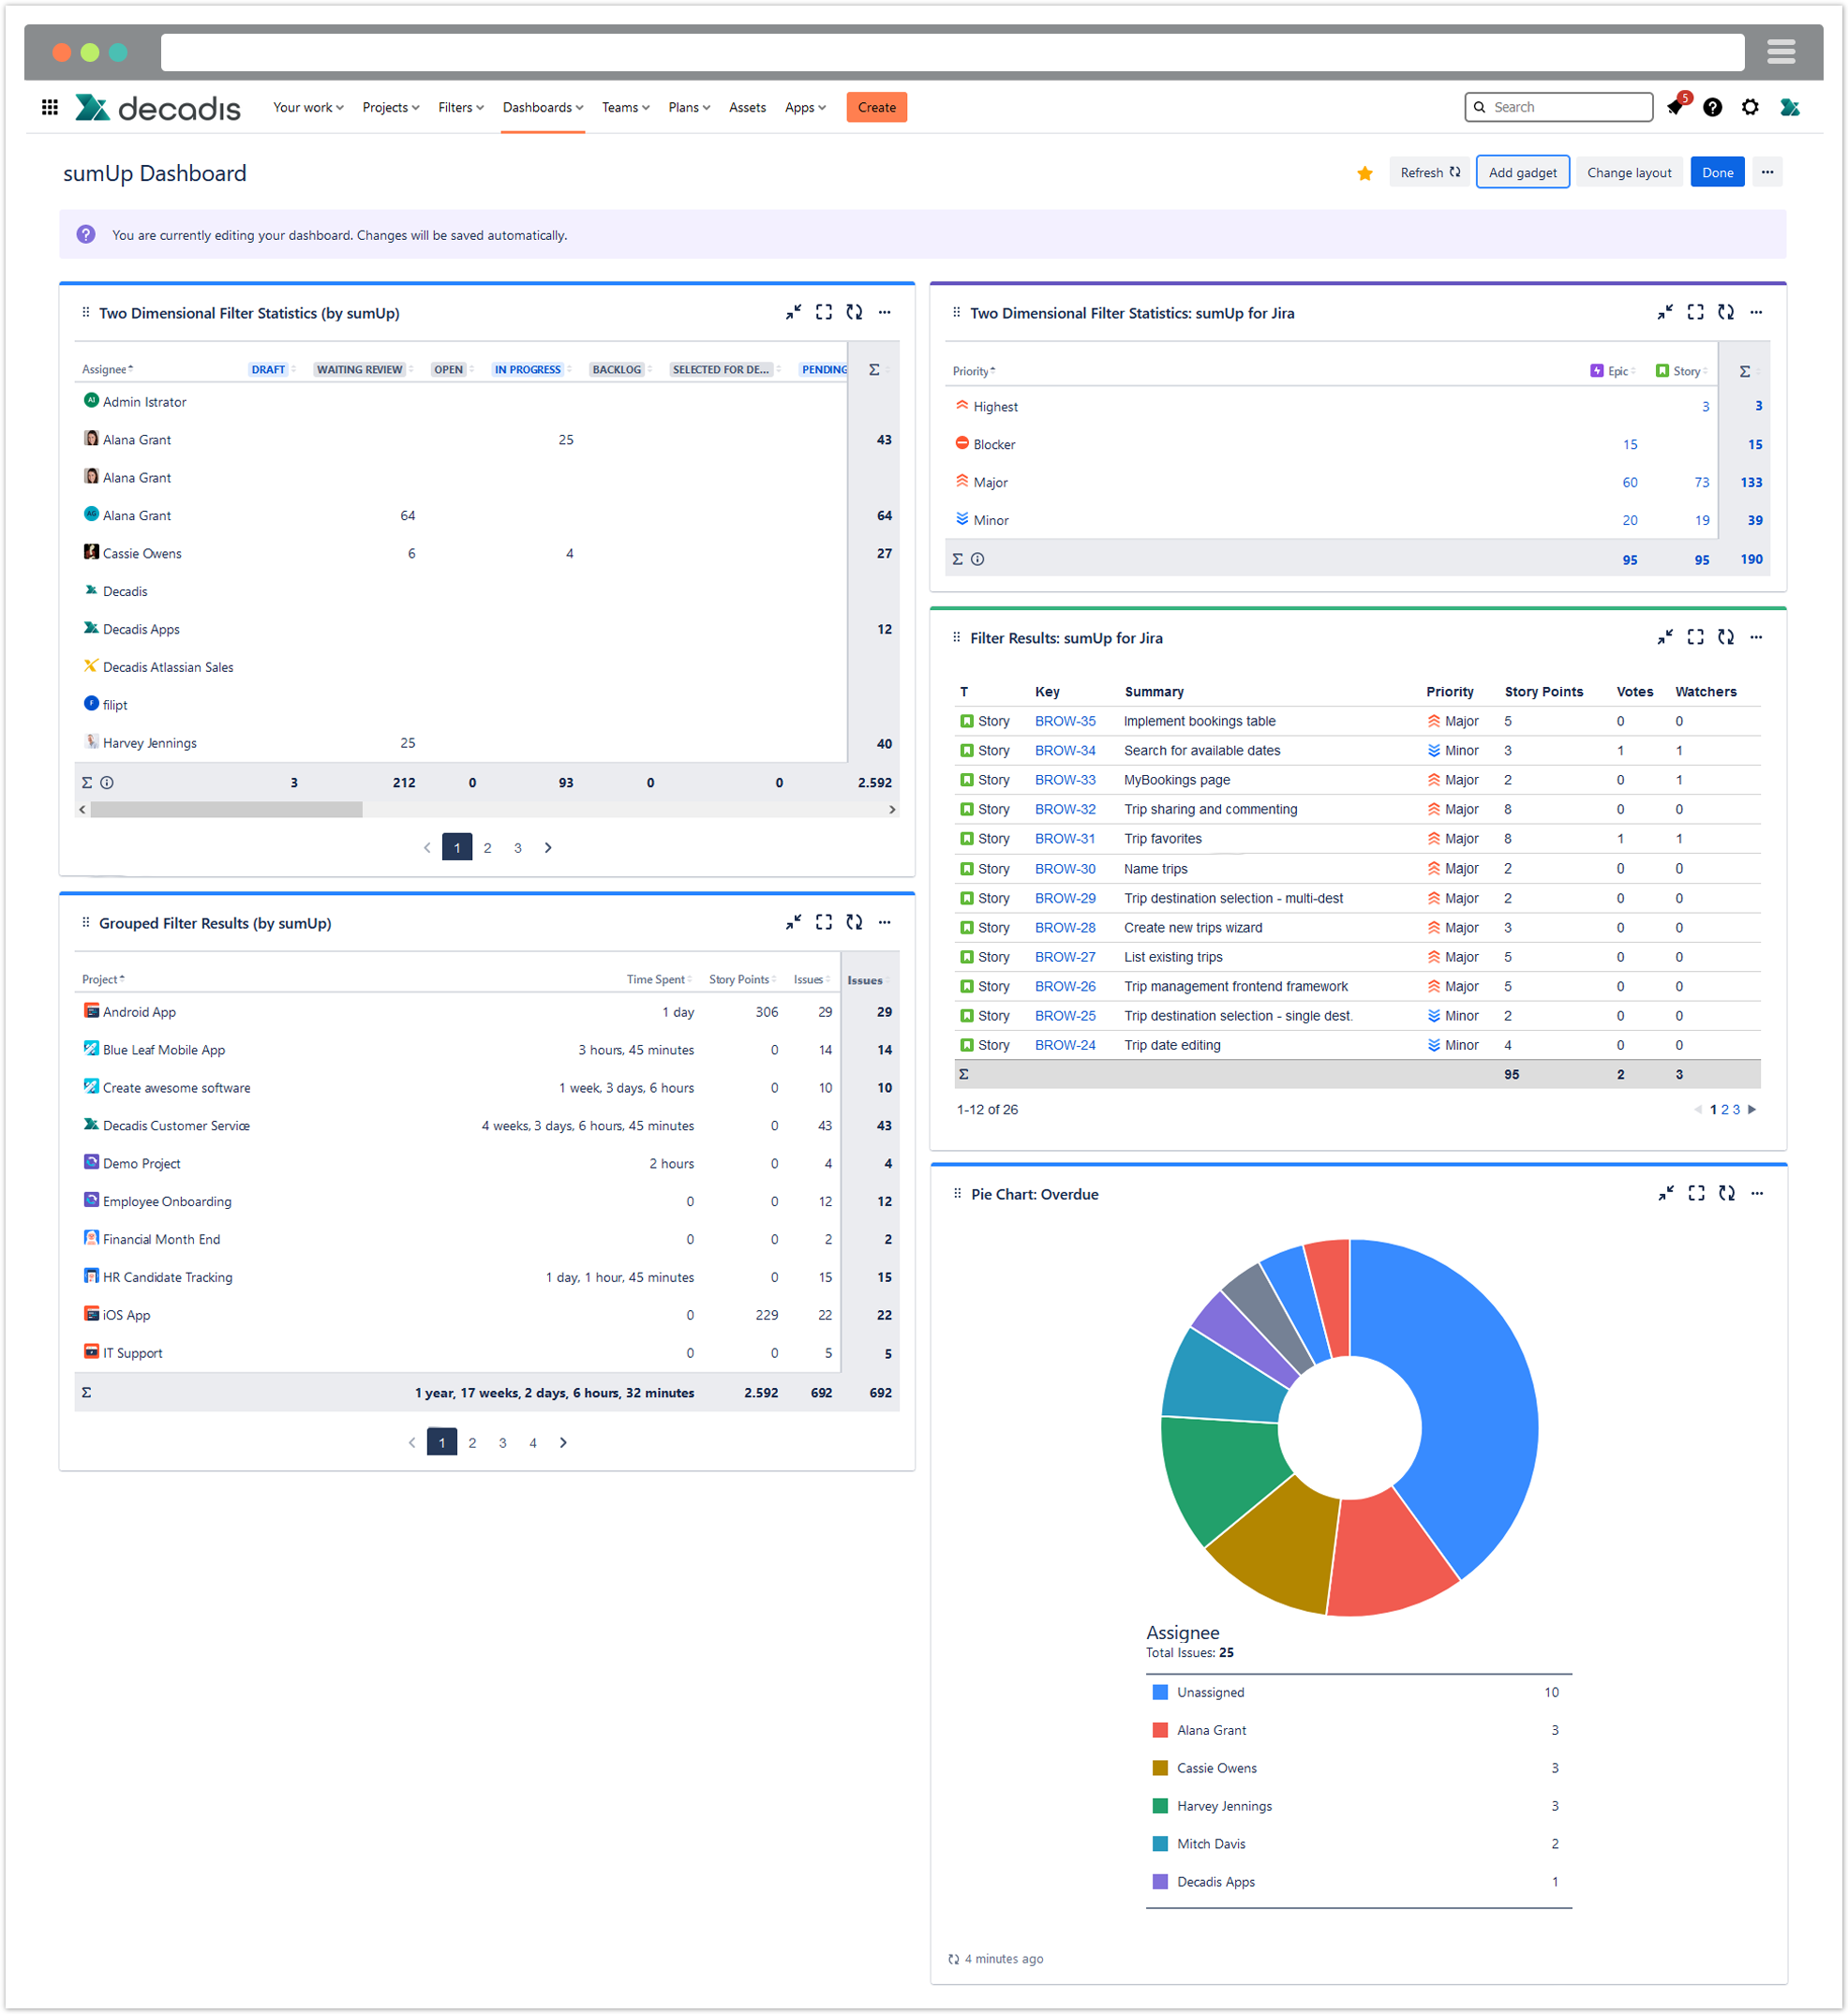
To get familiar with the different options the various gadgets have to offer we suggest adding all of them to your dashboard.
Add gadgets
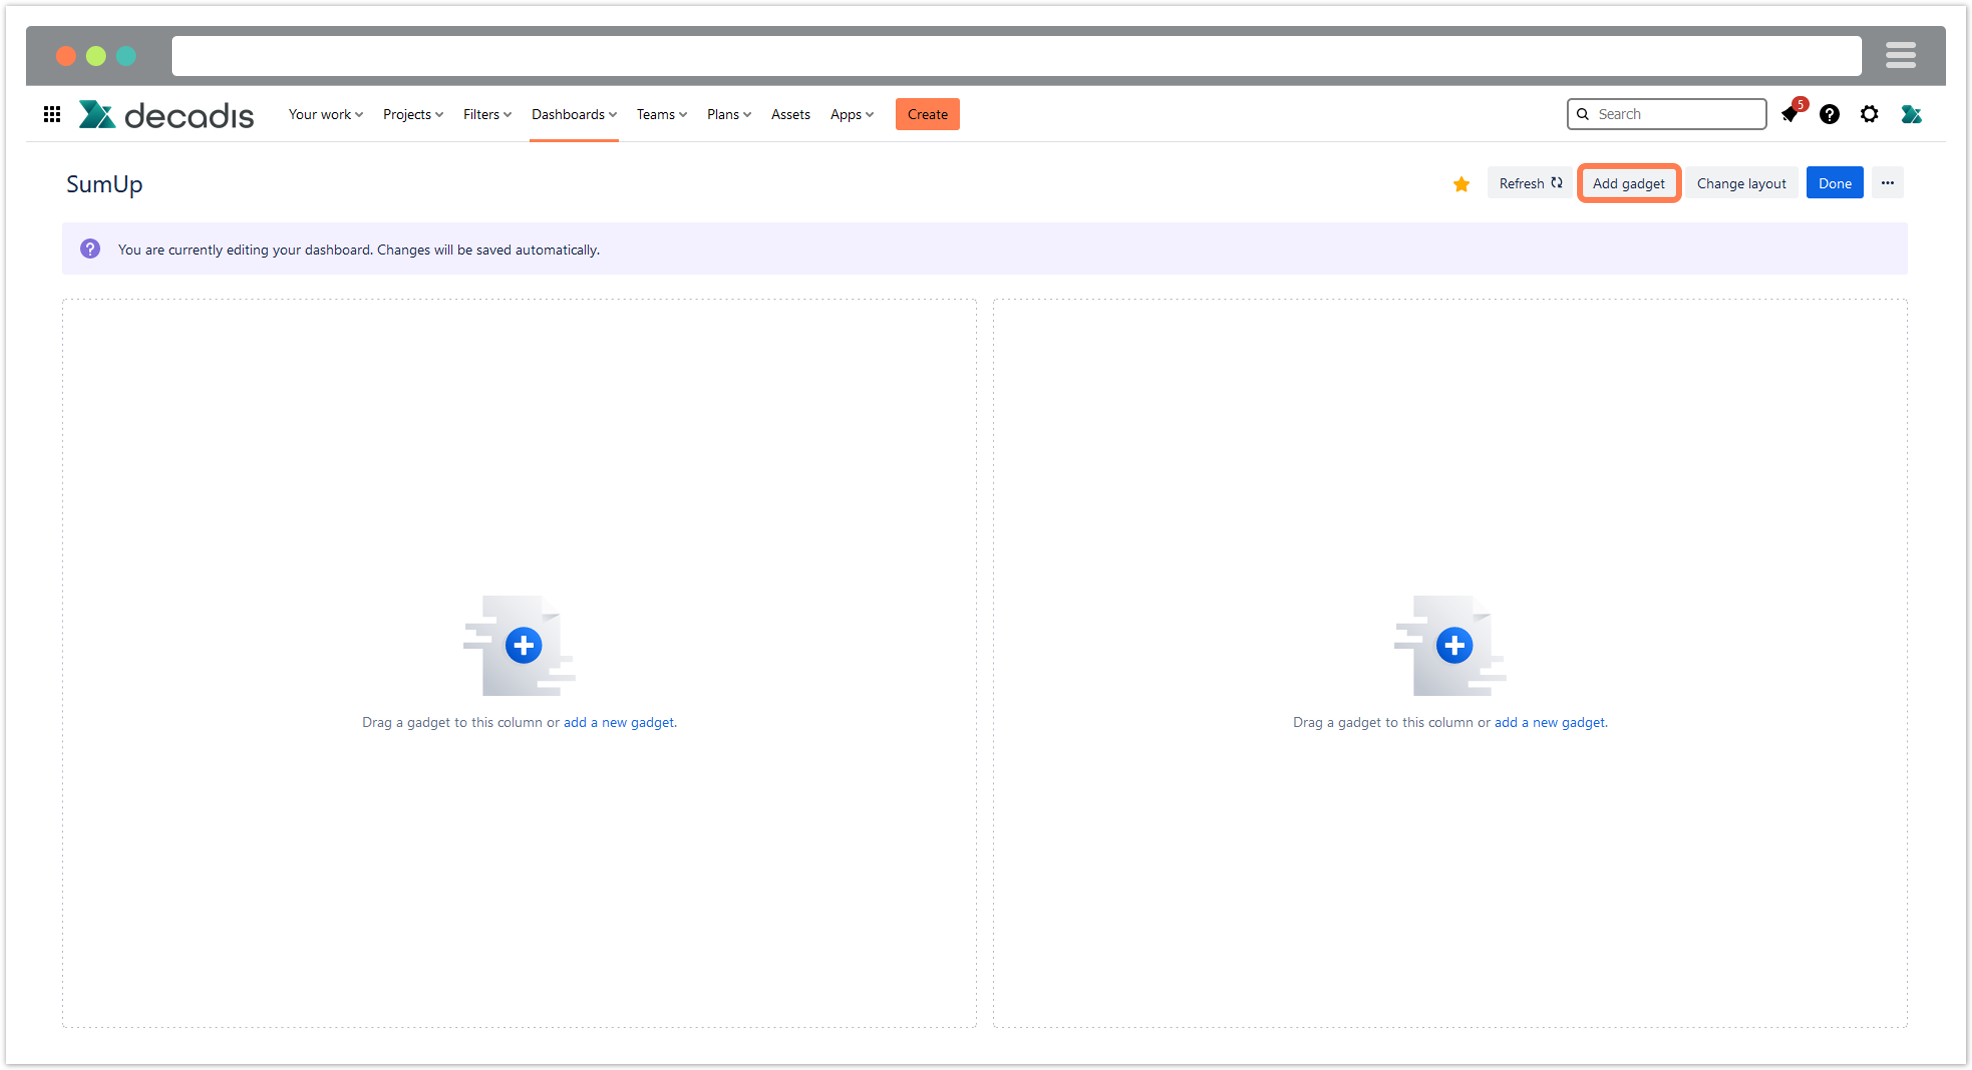
Simply add the gadget you need to your dashboard(s) and configure them according to your requirements.
To use sumUp on your dashboard view, click on Add gadget on the right side of your screen
An add gadget menu will slide from the right hand side of the screen, on search gadgets type in sumUp then click on add under the image of the desired gadget:
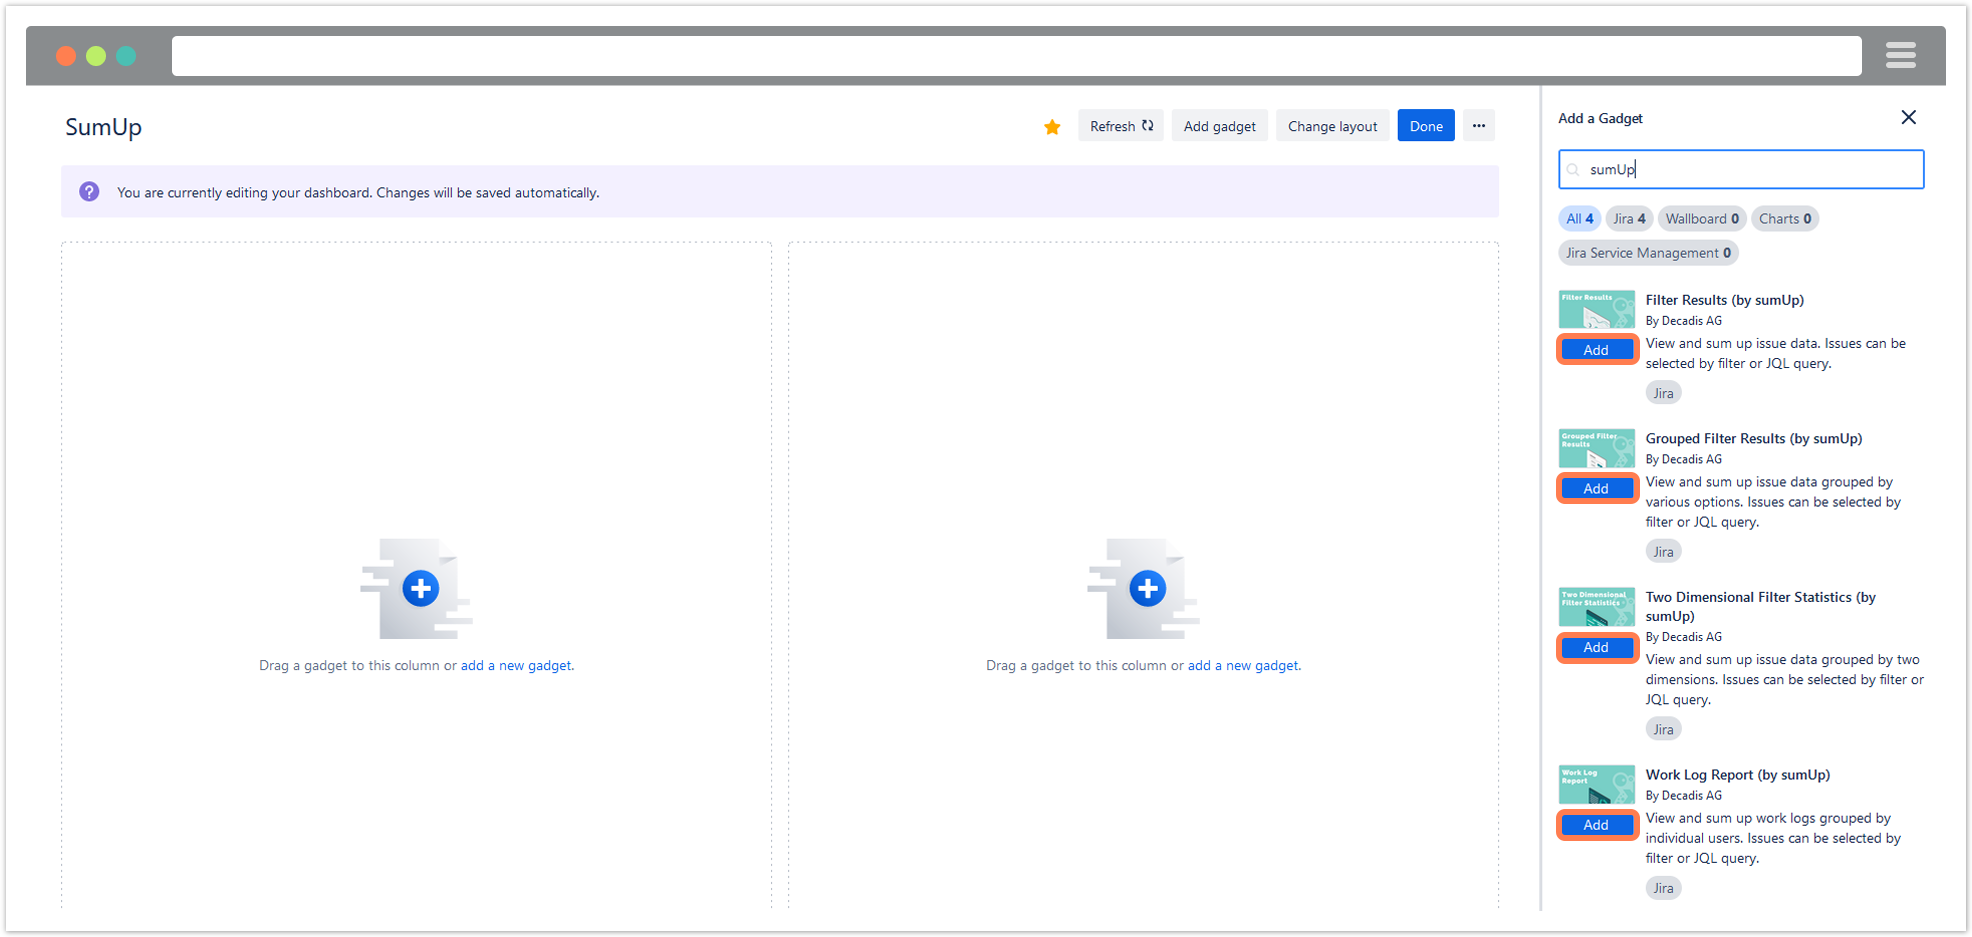
Configure the gadgets according to your needs. More details on the various parameters can be found on the relevant pages:
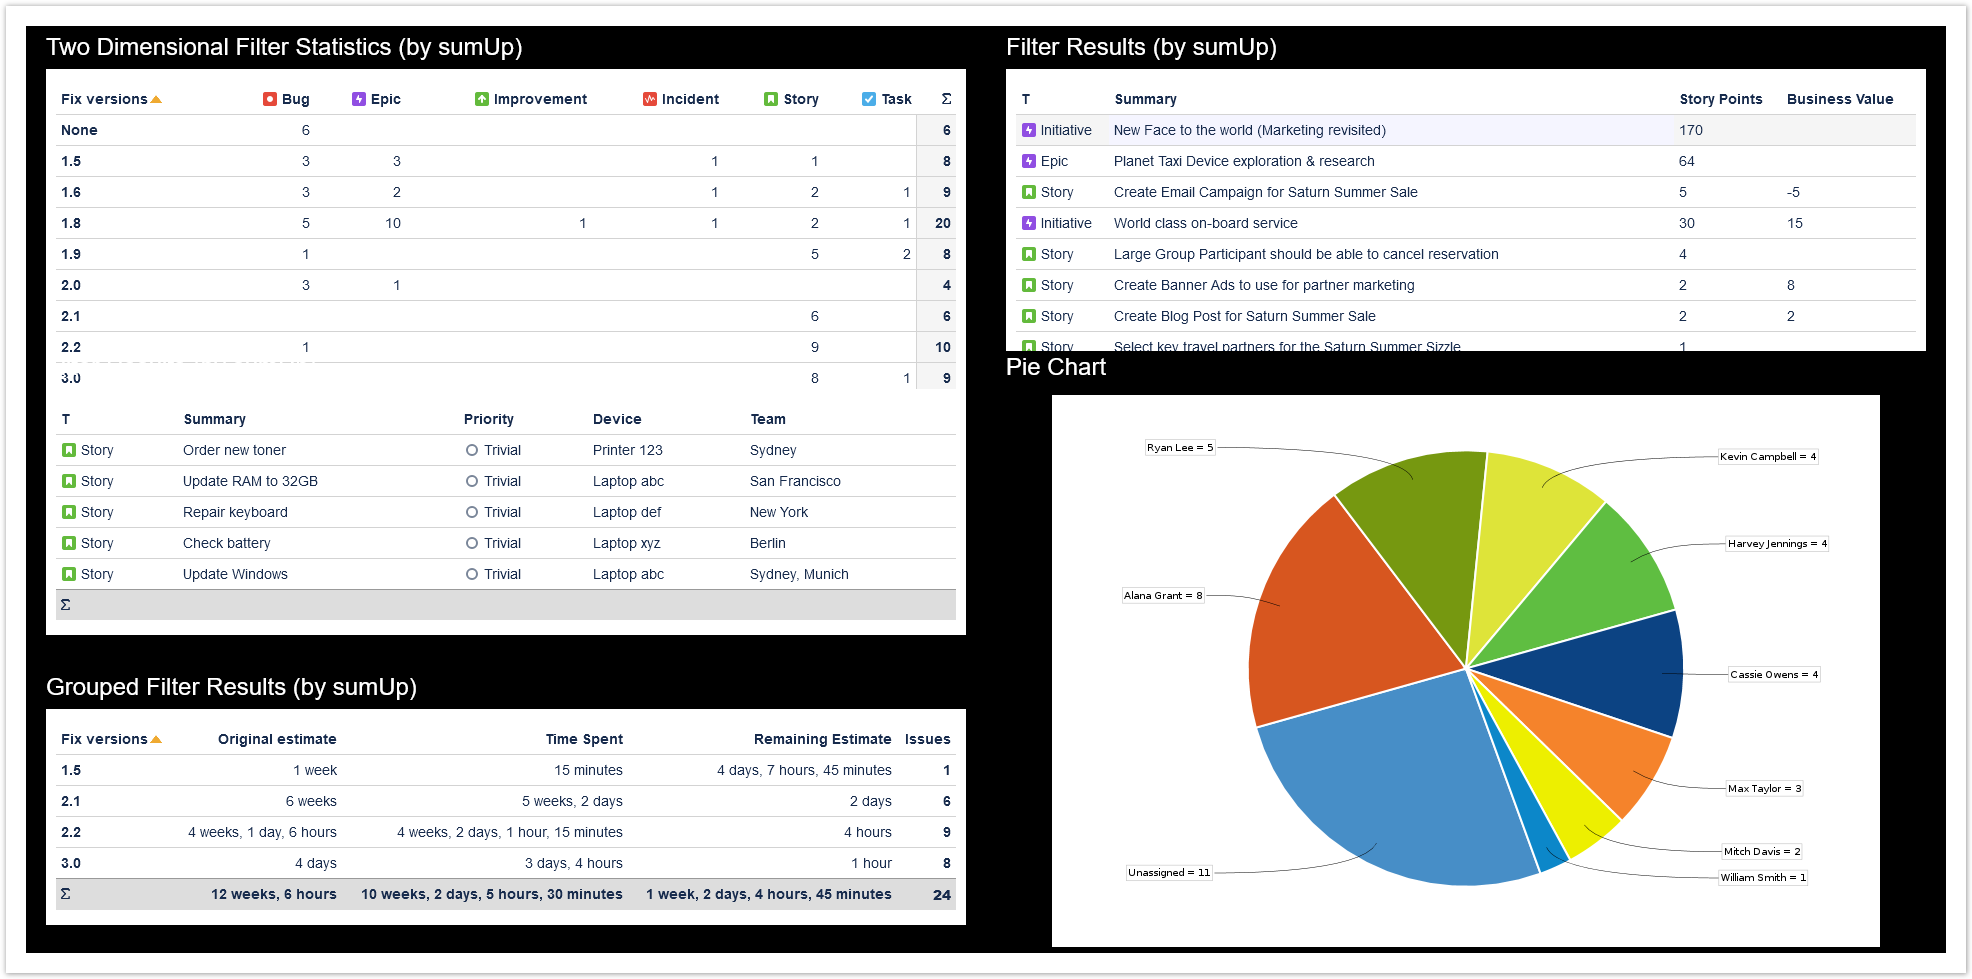
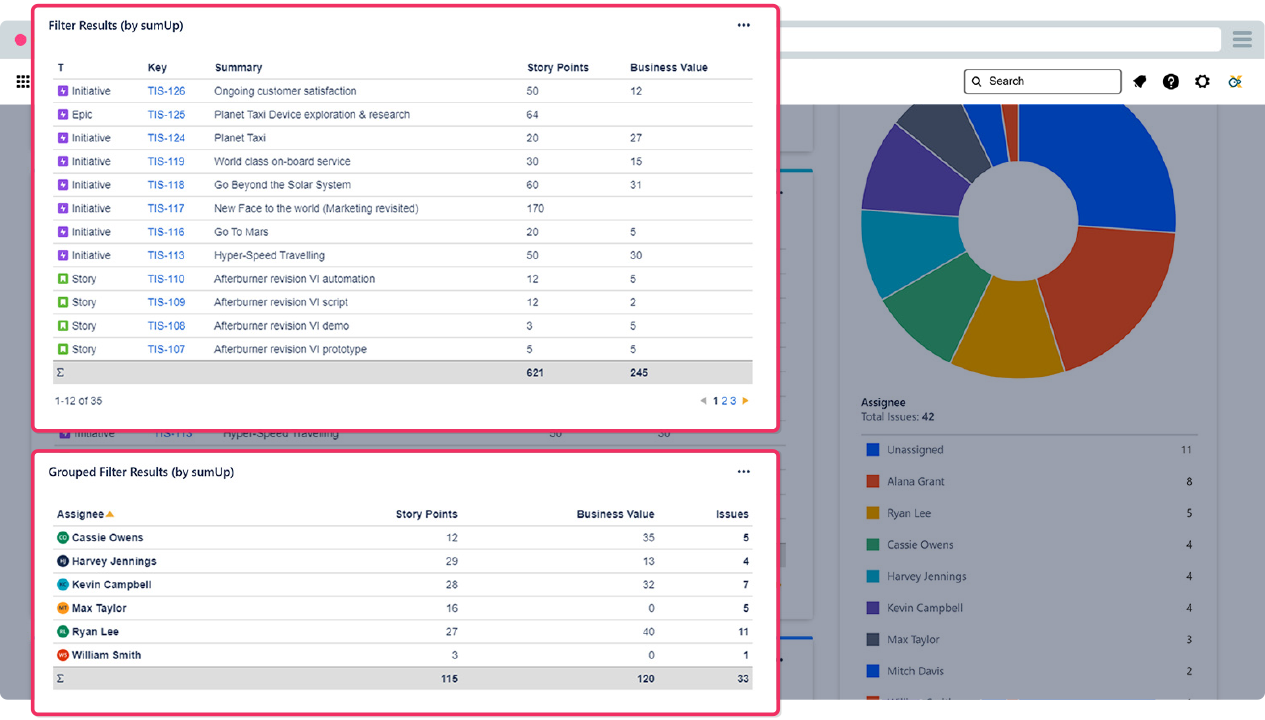
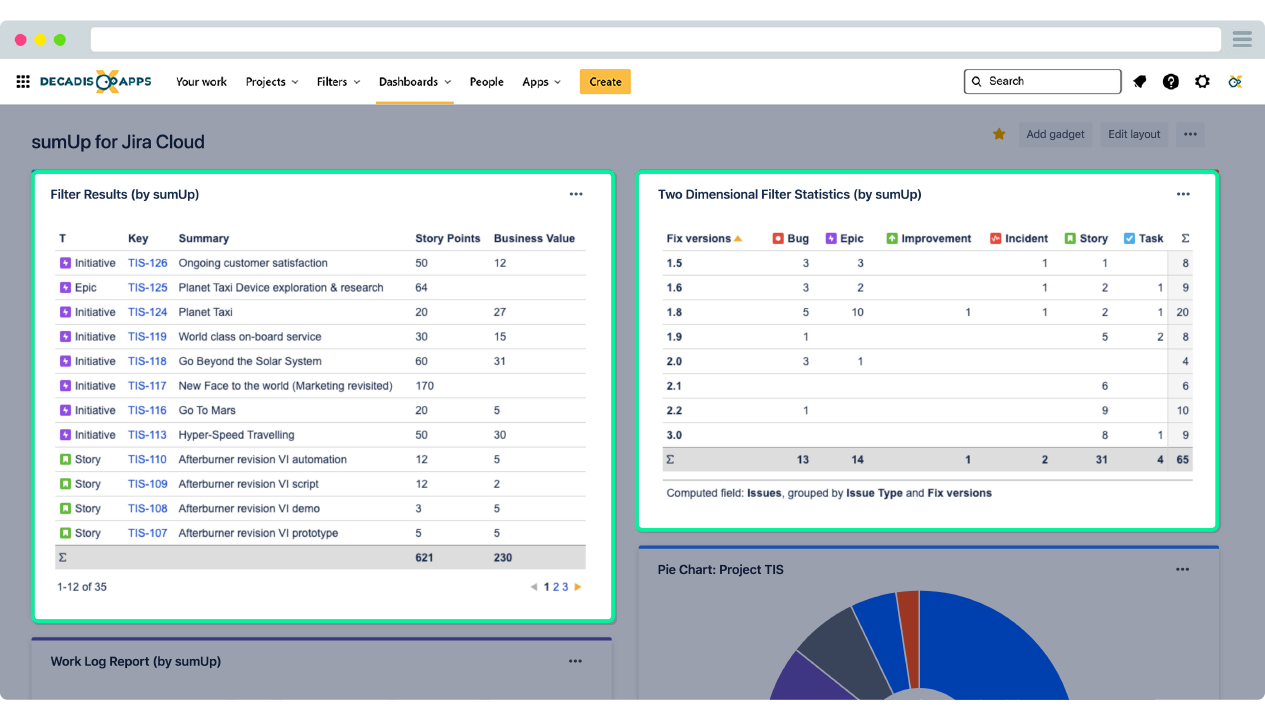
- Filter Results (by sumUp)
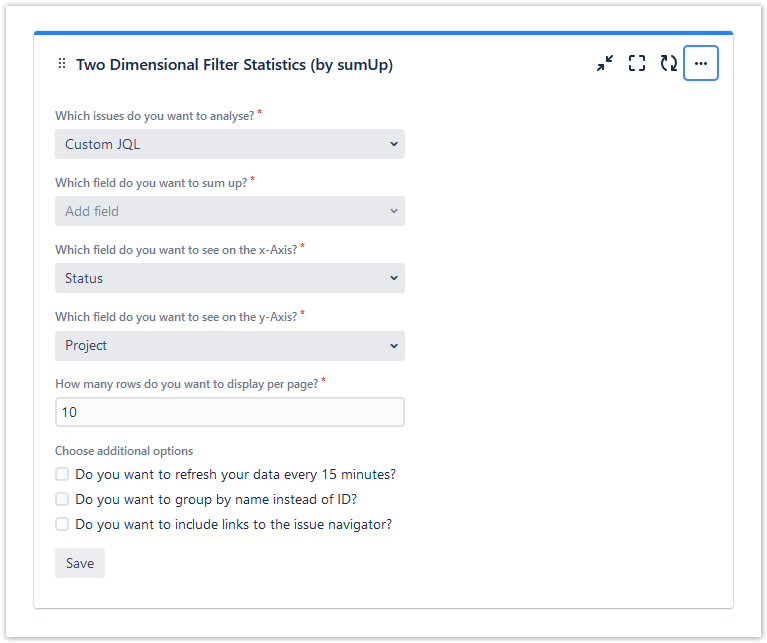
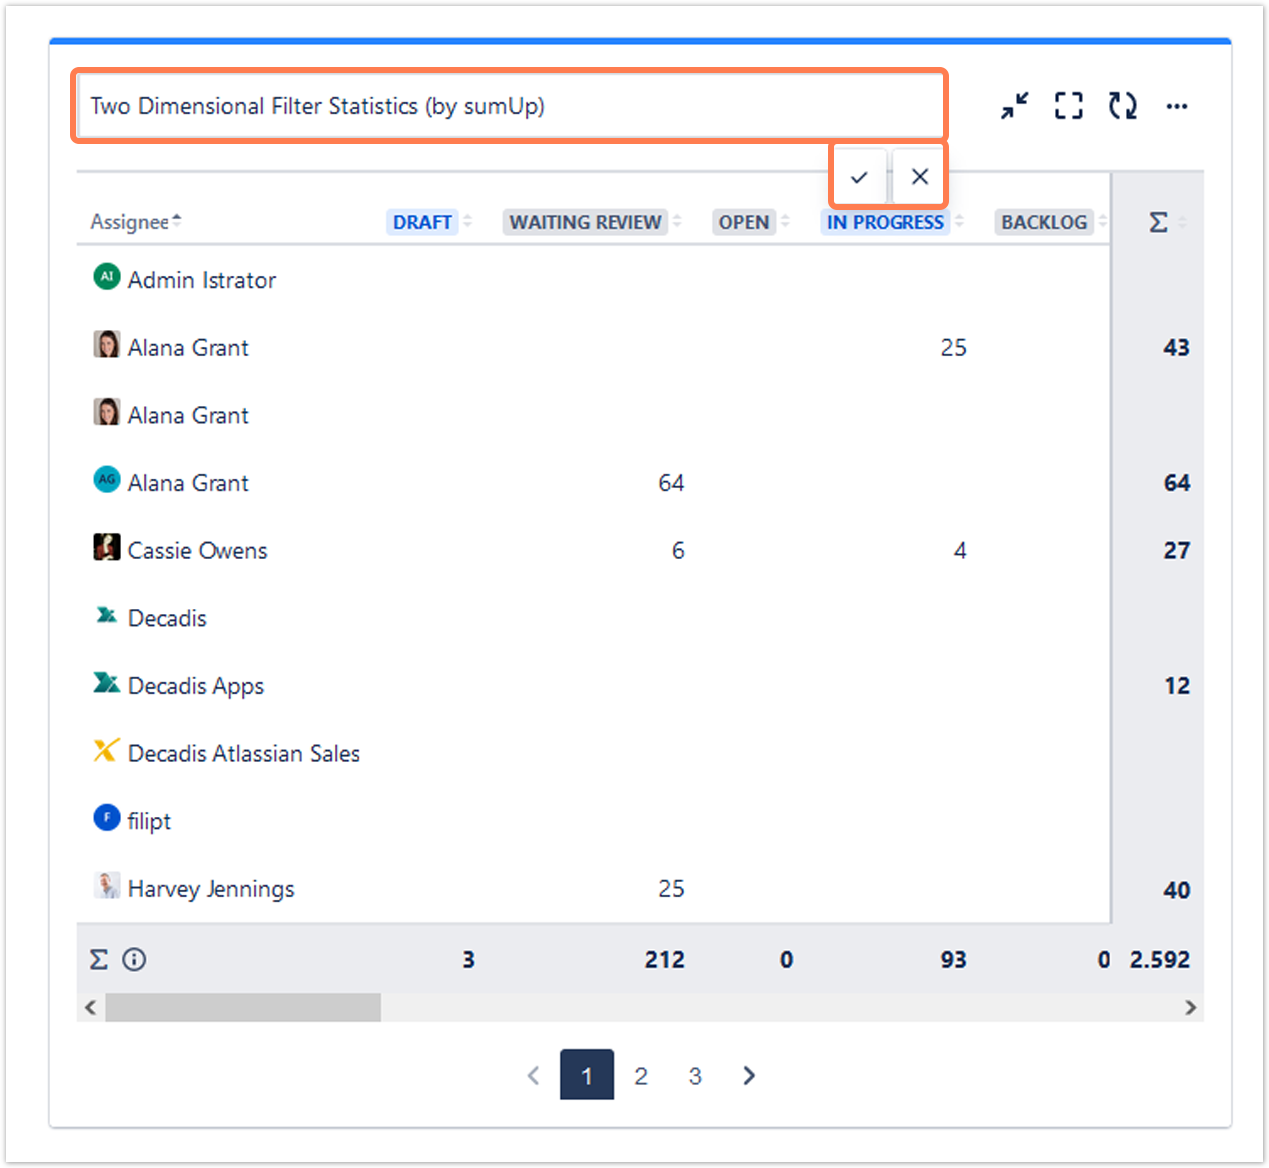
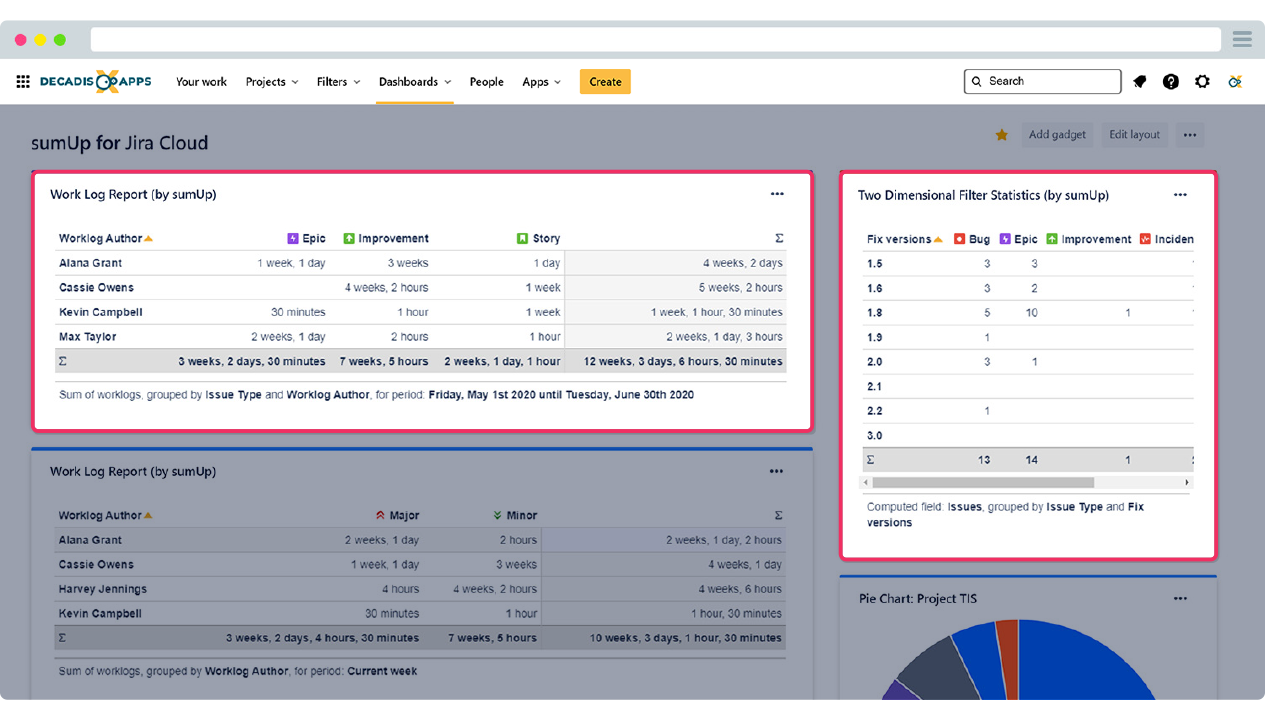
- Two Dimensional Filter Statistics (by sumUp)
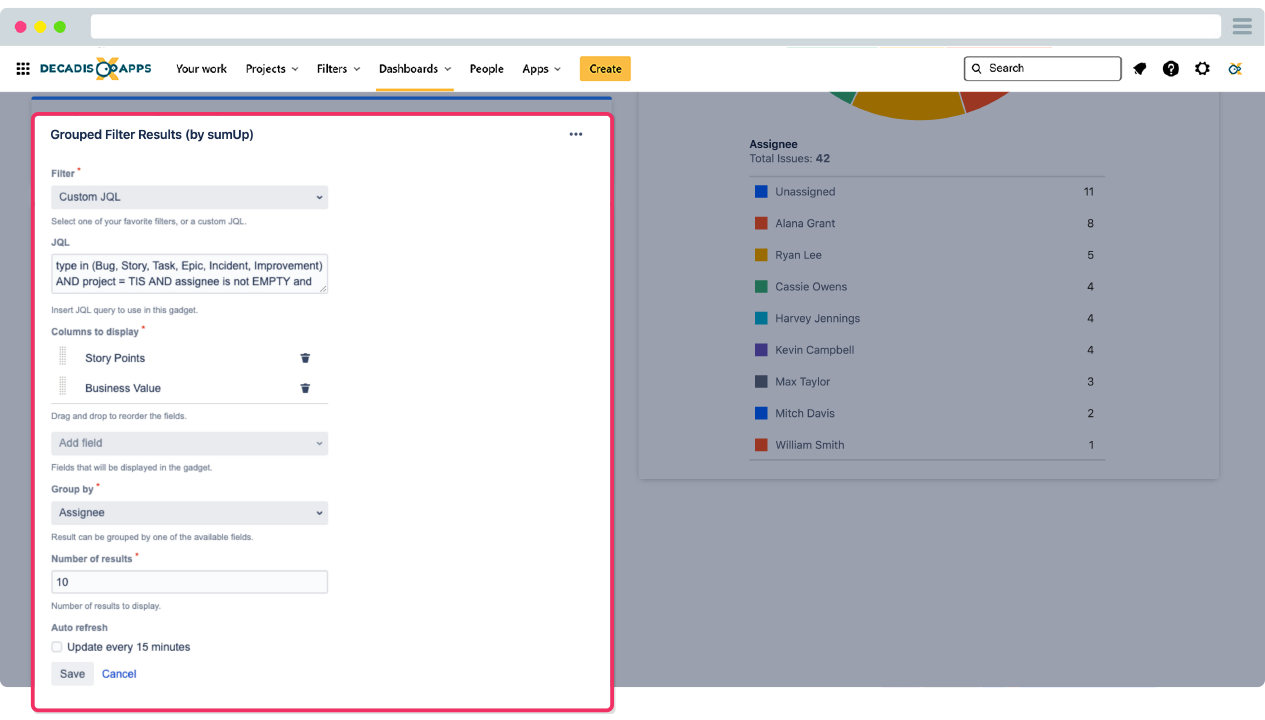
- Grouped Filter Results (by sumUp)
- Work Log Report (by sumUp)
Edit gadgets
After adding the desired gadget(s), you can edit them according to your preferences even when it comes to color and naming.
Click on the ellipsis menu ... on the top right corner of the gadget then you will see a variety of options you can do to configure and customize your gadget
Highlight color
Choose the desired color to highlight your dashboard.
Refresh
Refresh the data your dashboard is displaying.
The time it takes to refresh depends on the amount of data the dashboard is displaying.
Configure
You can configure your gadgets directly from the dashboard by clicking on the configure option.
Rename
Pro tip: Rename the gadget (by clicking on the Title ... and then rename, as shown below) to include information about what users can expect as a result.
View aid
You can minimize or maximize the gadgets to have the view that fits you better.
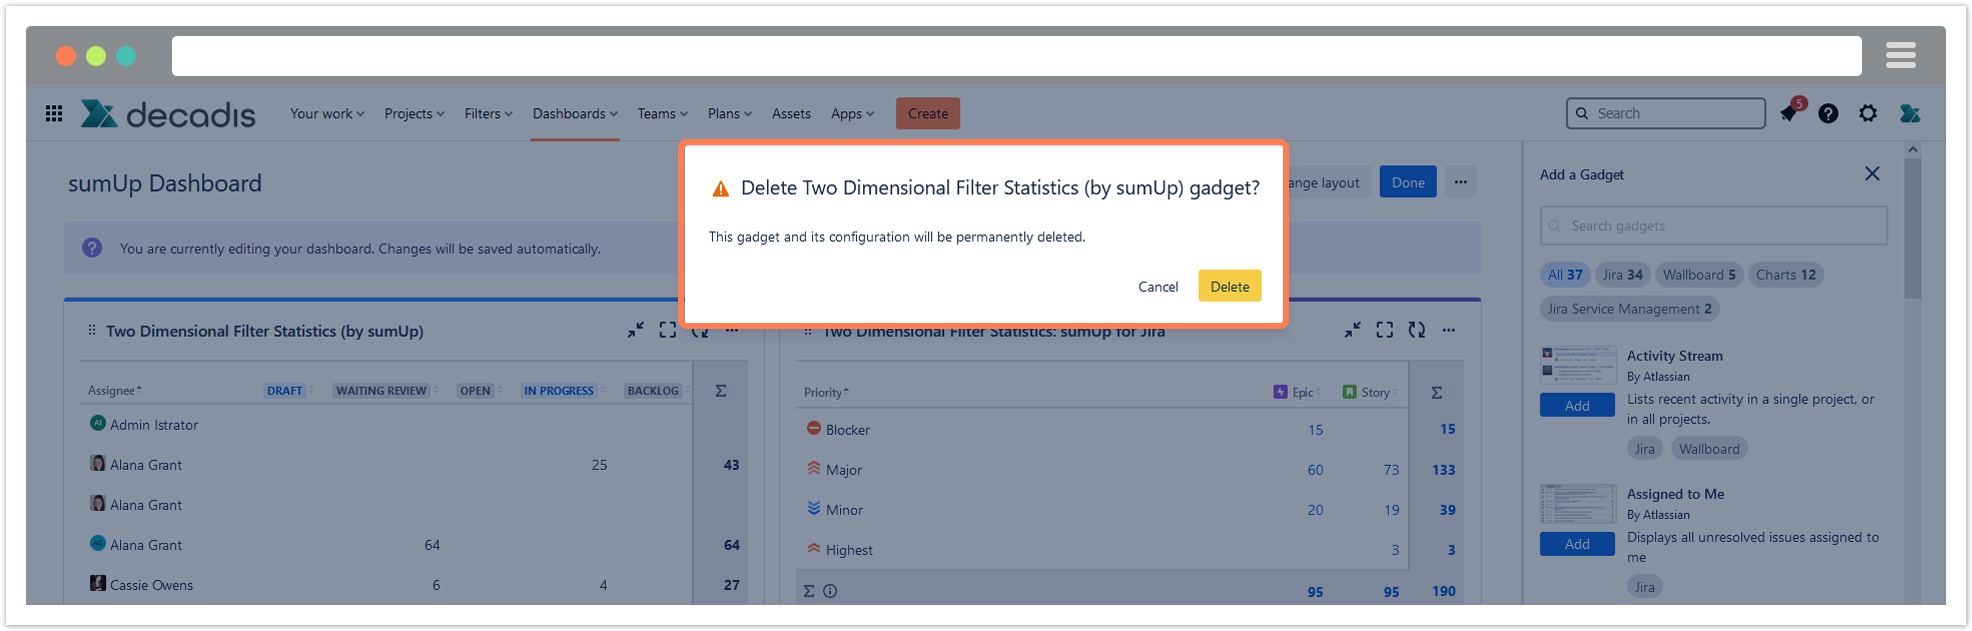
Delete
This option permanently deletes your gadget. A confirmation pop-up message will appear when you click on delete to double check if you want to proceed.
If you still have questions, feel free to refer to our support team.
Highlights
Instant-ready summation in dashboard gadgets
Calculate the sums of Jira system and custom fields - story points, time estimates, or any other number - without additional configuration or the need to code or script.
Made for Atlassian: sumUp for Jira Cloud fully supports team-managed projects (formerly next-gen), Advanced Roadmaps (formerly Portfolio) and Insight - Asset Management.
Not a number? Not a problem
The extended custom field support allows you to calculate sums across many additional custom and system fields, such as: status, watchers, or select lists and text fields containing only numerical values.
Effortless live data visualization
Use saved filters or choose custom JQL instead to create meaningful dashboard gadgets in just a few clicks and share them without the need to manage filter permissions.
Clear insights into the work of your teams
Report on logged work on issues, epics, and initiatives - on a project level or grouped by any field with customizable time frames across classic and next-gen projects.
![]()
![]()